Any discussion about Cricut is not complete without a look at all things BLADES. Blades can make a huge difference in your cutting for projects, and we will dive into the different types of blades and what they are all capable of. Cricut, above all, is a cutting machine, and you need the right blades to cut your designs on to the materials for your projects.
Luckily, Cricut Design Space will tell you specifically which blade you need for each material you select. If you do happen to use the wrong blade, there is a chance you can either damage your machine, the material, or both. Thus, pay close attention to what Design Space tells you about your blades, and you will be set without the risk of damage. If a blade does get damaged, Cricut sells all blades as replacements, and you can get new ones easily.
It is also important to mention that not all blades will fit or work in every Cricut machine on the market. Some blades are made for specific machines, whereas other blades will fit multiple machines. You will have to pay attention to which cutting machine you have, as well as which blades fit into each machine. Blades range in price, but depending on what you are making with your Cricut, you will need to go ahead and invest in different blades for different materials.
Cricut Joy
We are going to start with the Cricut Joy Blade, which obviously only works with the Cricut Joy. This blade requires the Cricut Joy Blade Housing, which is sold separately. Both of these tools come with your Cricut Joy, but if for some reason you need a new blade or housing unit, both are sold by Cricut. This blade cuts smaller projects out of any material used with the Cricut Joy with pristine lines and details.
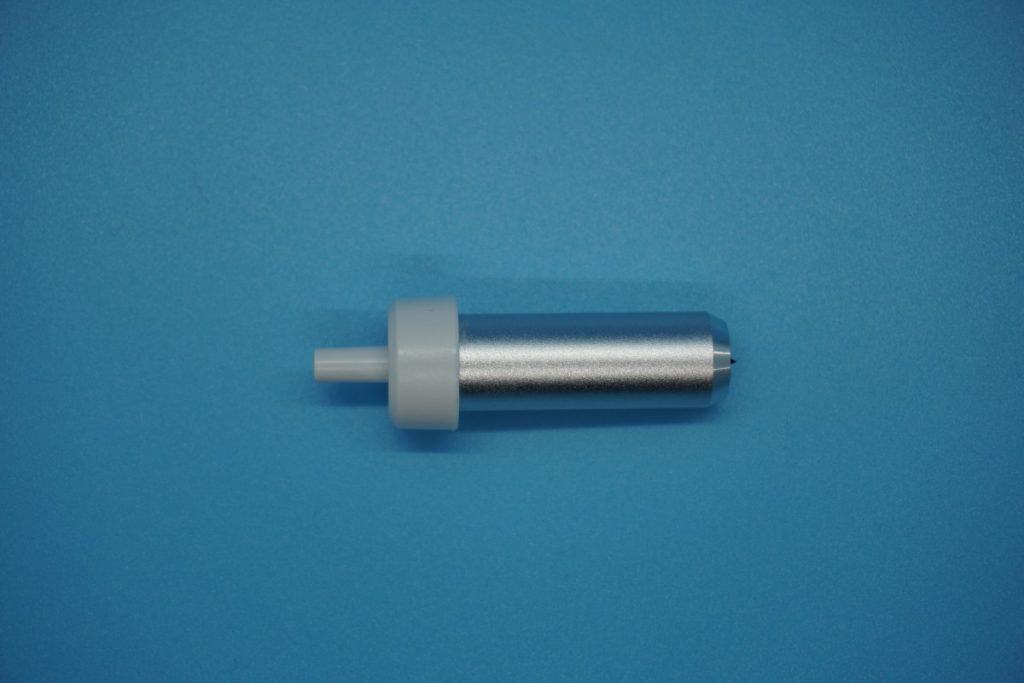
Since the Joy cuts and draws on a smaller surface, you can cut any material down to size to fit the Joy, and the blade will help you easily cut through any small or big project you can come up with. The Joy blade can cut through all Cricut Joy materials and most popular materials, including Smart Vinyl and Smart Iron-On. The materials used with the Joy blade need to be thin, so don’t use this for your thicker material projects.
Cricut Maker (only)
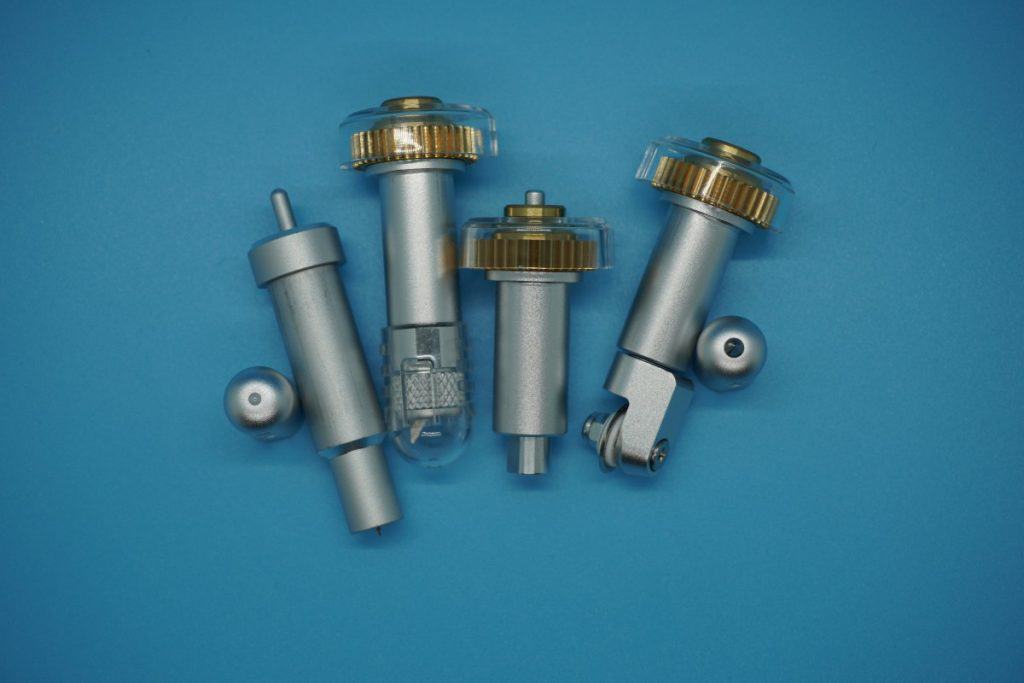
Some blades made by Cricut are compatible with only certain machines, and here, we will talk about those blades that are compatible only with the Cricut Maker. These 4 blades are not the only blades that can be used with the Maker, but they are the ones that are made specifically to be used with only the Maker. Note that 3 these blades do not come with your Maker, and would have to be purchased separately if you want to be able to use them.
Knife Blade
The Knife Blade is one you might want to invest in if you are cutting heavier materials with your Maker. This blade does require a Knife Blade Drive Housing (sold separately) in order to work. This blade cuts thicker materials including ones like craft foam, balsa wood, matboard, leather, and more.
I will let you know that this blade is not recommended for cutting any images that are smaller than ¾” because of the minuteness of the lines and designs, which will not be able to be discerned with the knife blade.
The Knife Blade helps add texture and dimension to your thicker material projects and will leave clean cuts and designs. It is necessary to mention here that the Knife Blade projects usually take a lot longer to cut and are not able to be done from mobile devices for this reason.
If you are using Bluetooth to cut with your Knife Blade, be sure to turn to sleep off on your computer so that you do not risk an interruption in your Bluetooth connection, as well as the potential loss of your cutting progress.
Rotary Blade
Another Maker specific blade is the Rotary Blade, which is one of the blades included with your Cricut Maker. This blade cuts delicate paper (like crepe or tissue paper) and almost any fabric material, without having to use backing. From silk to denim and burlap, the Rotary Blade will be your perfect cutting companion, especially if you plan to create sewing and craft projects using fabric materials. It is suggested to use the Fabric Grip Mat for best results with the Rotary Blade.
It is important to note here that because the Rotary Blade has a curve to it, it makes a slight overcut of the cut paths on images. This is to make sure that the full length of the line is completely cut. Due to this, it is important that you have at least ¾” or more space between cut paths, and that images are larger than ¾” in overall size.
It is not recommended to cut intricate or heavily detailed images with the rotary blade because you will not get as clean of a cut as you would with a finer, straighter blade.
Quick Swap Perforation Blade
The Quick Swap Perforation Blade is one that uses the Quick Swap Housing (sold separately) and works only on the Maker. The Perforation Blade is one that is used on paper projects where you want pieces to tear off, such as raffle tickets, tear-out booklets, or signs with tear-off pieces. Using this blade takes away the need to fold the pieces before they are able to be torn off.
The Perforation Blade can cut paper, cardstock, foil, and more. Cricut does offer a bundle with the QuickSwap Housing and Perforation Blade together if you need both.
Quick Swap Wavy Blade
When you are making cards envelopes, tags, and other projects, you sometimes want a fancy decorative edge, right? Well, the Quick Swap Wavy Blade is another blade for the Maker that uses the QuickSwap Housing (sold separately) that can do just that.
Once this tip is on the QuickSwap Housing, you are all set to have a wavy edge on many materials, including vinyl, paper, cardstock, fabric, and more. Adding this extra flair to your projects is a breeze with the Wavy Blade.
All Cricut Machines (except Joy)
There are 3 blades that can be used with all currently released Cricut machines, with the exception of the Cricut Joy. These machines include the Maker, Explore, Explore Air, Explore Air 2, and the Explore One. These 3 blades can be used on any of these machines to help you cut your materials accurately to make your perfect projects.
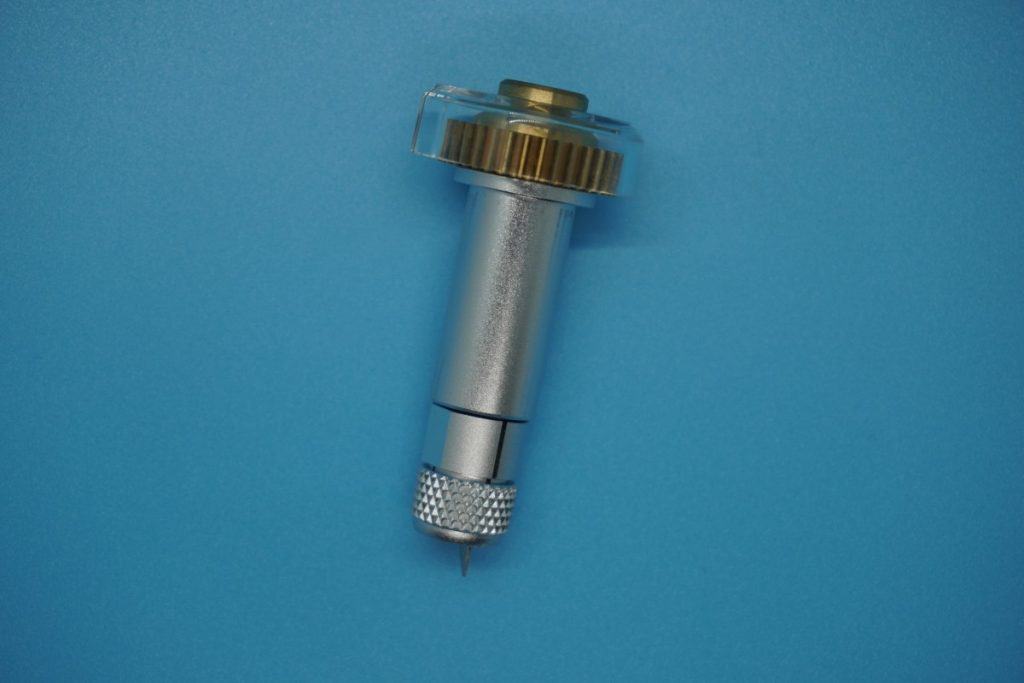
Deep-Point Blade
The Deep-Point Blade is one that you might want to invest in if you are cutting thicker materials. This blade is not only a blade of stronger steel, but also one that is at a different angle (60 degrees instead of 45) to use with a magnet, cardboard, chipboard, foam sheets, stamp material, and more.
This blade makes it simple to cut materials up to a 1.5mm thickness in a much quicker, more efficient way. Again, this blade requires its own housing, which Cricut sells as with the blade itself (replacement blades also come in packs of 2 without the housing).
Premium Fine-Point Blade
The Premium Fine-Point Blade (included in Air Explore 2 & Cricut Maker) is probably the one you will be most familiar with, especially if you have a Cricut Maker or Air Explore 2, as it is included in the machine, with its housing unit.
This blade is perfect for vinyl, cardstock, paper, and light fabrics. This blade is engineered to stay sharp over longer periods of time, but there are replacement blades (in 1, 5, or 10 blades) available from Cricut.
The Premium Fine-Point Blade will more than likely be the one you use most frequently with the Maker or any of the machines in the Explore family. Since this blade is fairly versatile and comes as an included blade with these machines, it is one that is frequently used.
Design Space will help you decide if your material will work with this blade, but since it can cut different types of vinyl, papers, and lighter fabrics, you should be set with this blade for a majority of your projects.
Bonded-Fabric Blade
The Bonded-Fabric Blade is another blade that can be used with the Maker or Explore family of Cricut machines. Again, this blade has a housing unit (sold as a set with the blade itself). This blade is specifically made to cut fabrics that have iron-on backing or bonded fabrics
For the longest life of this blade, it should only be used with these types of fabrics. To be able to tell this blade apart from others, it comes in a pink color, which matches the color of the FabricGrip Mat.
Blade Housing
Each blade, for the most part, has its own blade housing unit, with the exception being the QuickSwap housing, which can switch out six different tips/blades (only for the Cricut Maker). Other than that exception, each blade needs its own blade housing.
It is important to know which blade comes with your Cricut, which means it also comes with the housing for that blade. Should you ever have to replace the housing unit when you replace your blade, they are sold by Cricut in combined packages that contain a blade and a housing unit.
The Cricut Joy has its own blade and housing, which both come with your purchase of the machine. Cricut does sell Joy replacement blades, both with and without the housing unit. It is important to only use the Cricut Joy blade and housing unit in the Joy and not try to use other blades, as it will either damage your machine, your material, or both.
When Should You Change Your Blade?
When your cuts are not precise and not easily weeded or peeled apart, it is more than likely time to replace your blade. The sharpness of your blade depends on how often you use it, and thus, if you are using it frequently or use it for heavier materials, you may have to replace your blade more often.
This is why Cricut does offer some blades in multipacks (2, 5, or 10 blades) so that you can buy many at once and you will not have to worry about buying individual blades every time your blade becomes dull (and wait for them to arrive!).
For blades used primarily with fabric (such as the Rotary Blade), you will start seeing uncut threads and the settings in Design Space may no longer seem accurate to what you are trying to cut. This is important to note, as you may not notice as stark of a difference in the fabric as you would in vinyl or paper when blades need to be replaced.
When you start seeing these threads, it is important to go ahead and replace your blade as soon as possible so that you do not run the risk of damaging your materials or ruining your intended project all because of a dull blade.
How to Replace Your Cricut Machine’s Blades
A fair warning (not that you necessarily need it) that Cricut blades are sharp, and you need to be seriously careful when you are replacing them. Obviously, you really do NOT want to slice your hand open just by replacing your Cricut blades.
Replacing your blades is actually a fairly simple process, especially if you have a Cricut Maker or one in the Explore family. When replacing your blades, be aware that you more than likely will not have to replace the housing as well, but just the blade itself.
For the Cricut Maker and Explore family of machines, replacing blades is a fairly quick (and we can only hope painless) process. This process is a little different for “legacy machines,” which directions can be found for on the Cricut website.
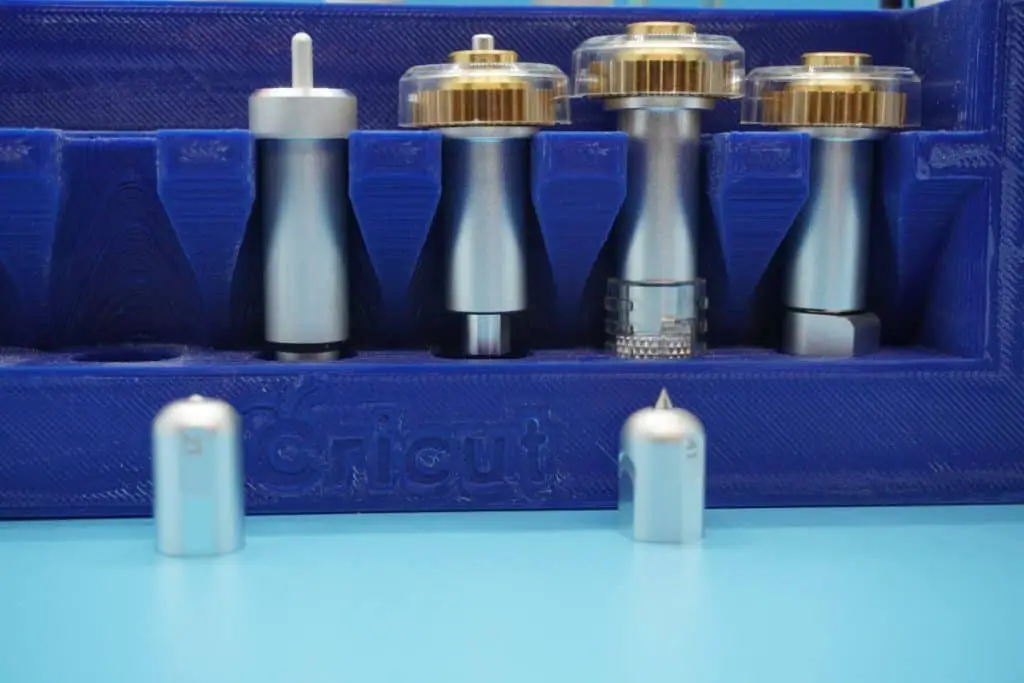
Since most people have a Maker and/or a machine in the Explore family, here is a step by step breakdown of how to replace your blades in a Cricut Maker and/or Explore family machine:
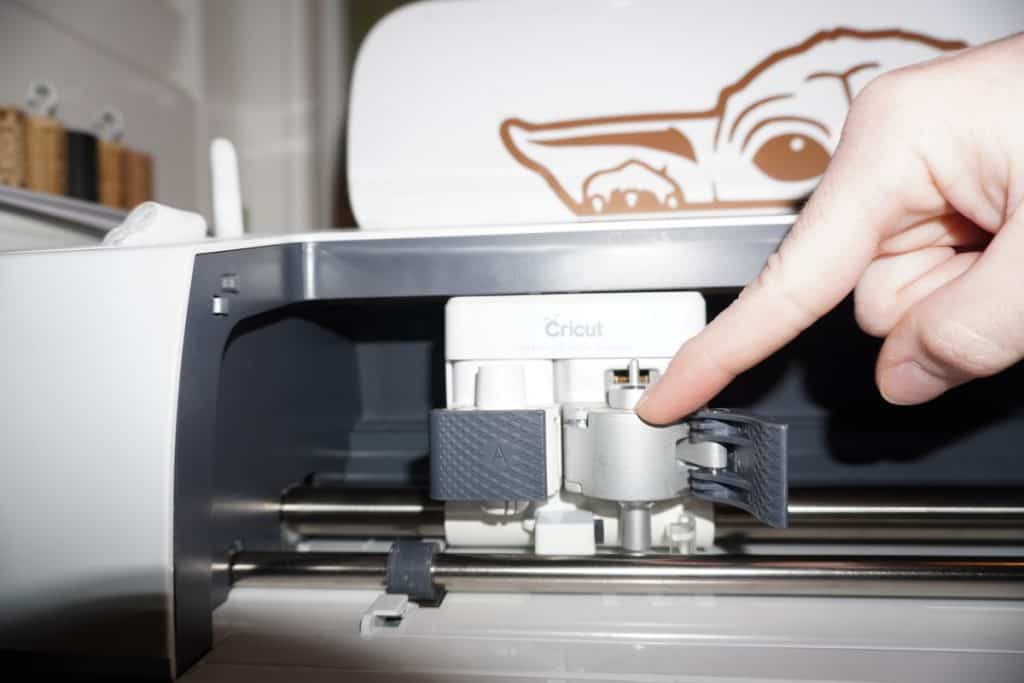
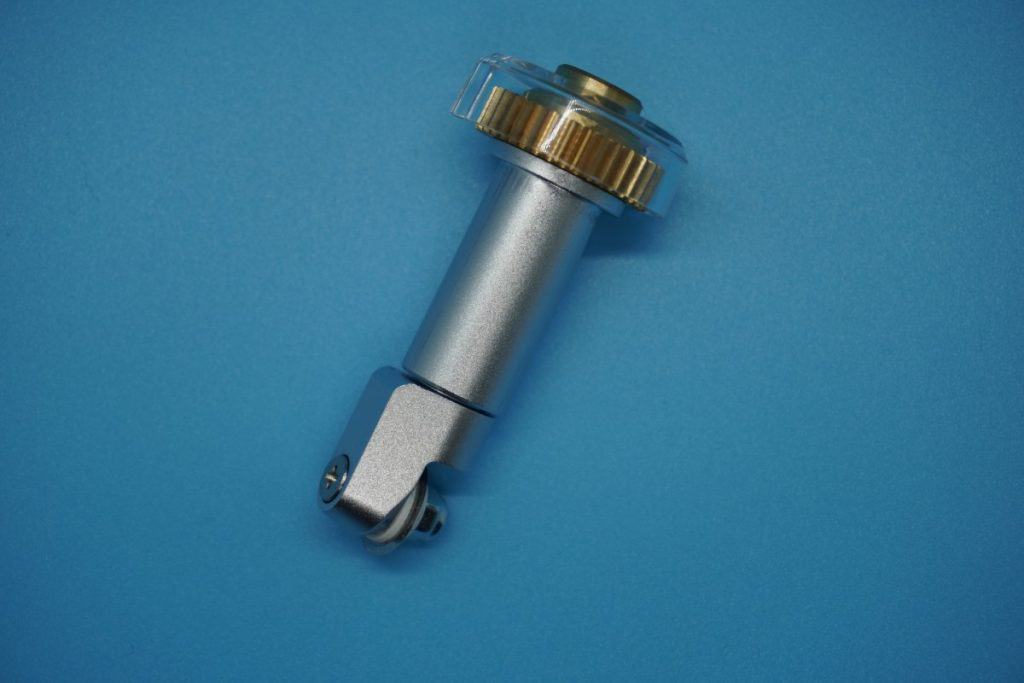
Clamp “B” is located to the LEFT 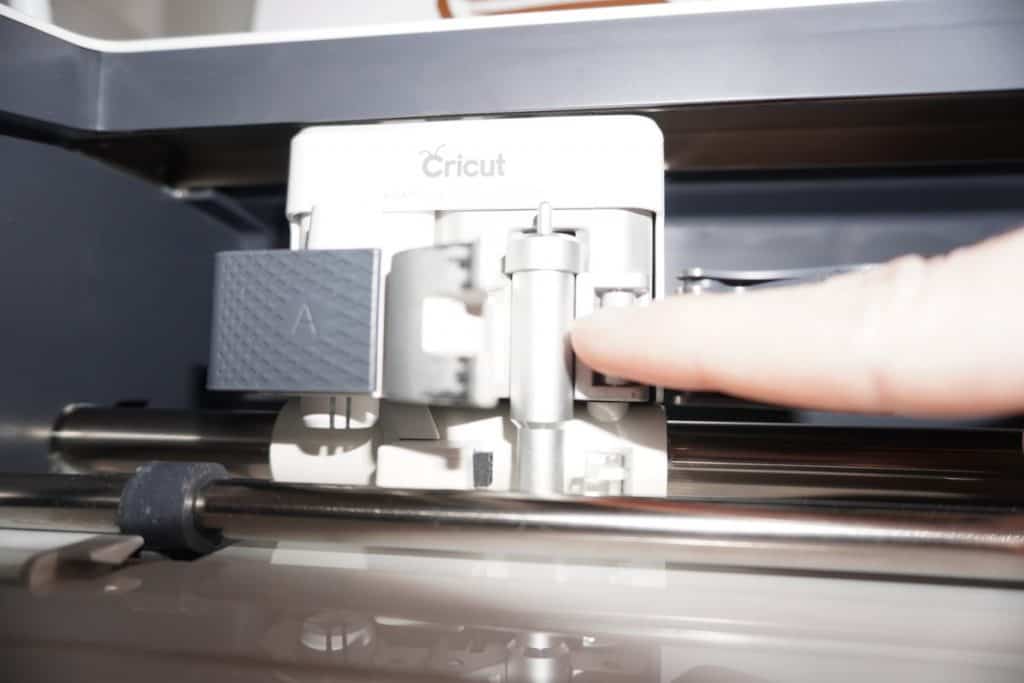
Open BOTH parts
See images above of where the clamp B is located and how to open it:
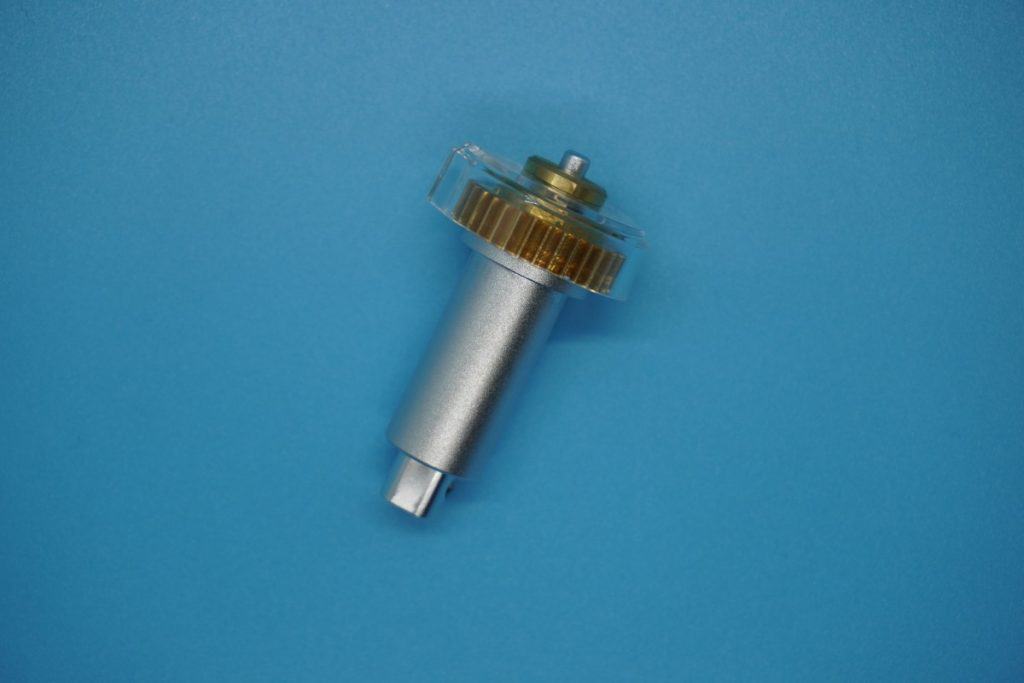
- Open Clamp B and take the blade housing out.
- For the following blades, carefully push the pin on the top of the housing unit and gently pull out the blade from the bottom. Again, this will be sharp. This applies to Premium Fine-Point, Deep Point, and Deep-Cut blades.
Important note: If you are trying to replace the Knife Blade or Rotary Blade on the Maker, I advise you to go to the Cricut website and follow their specific guidelines for these blade replacements. They have both articles and videos explaining how to replace these specific blades. - Take the protective cover off of your new replacement blade very carefully. I advise you to go ahead and save this cap so that you can cap the old blade just to be one the safe side when you dispose of the old blade.
- Carefully insert the new blade into the blade housing. The magnet on the blade housing holds the blade in place.
- Put the blade housing back into your machine. With the Maker and Explore family of machines, return the housing unit to Clamp B, and close it. You are now good to go, with your sharper blade being ready to cut anything your heart desires. Follow these steps every time you need to replace any of the blades in your Cricut machine.
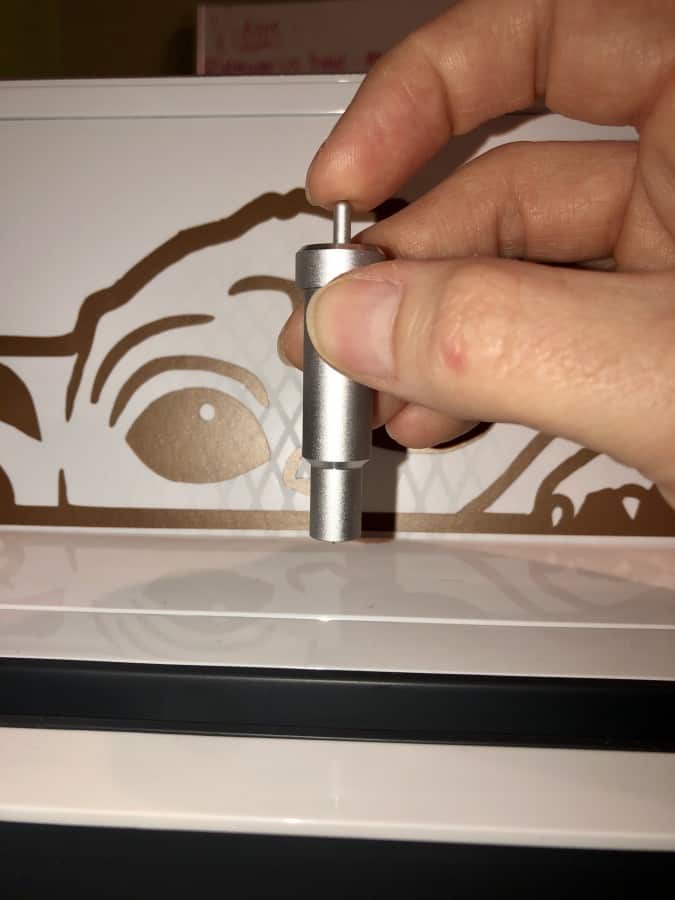
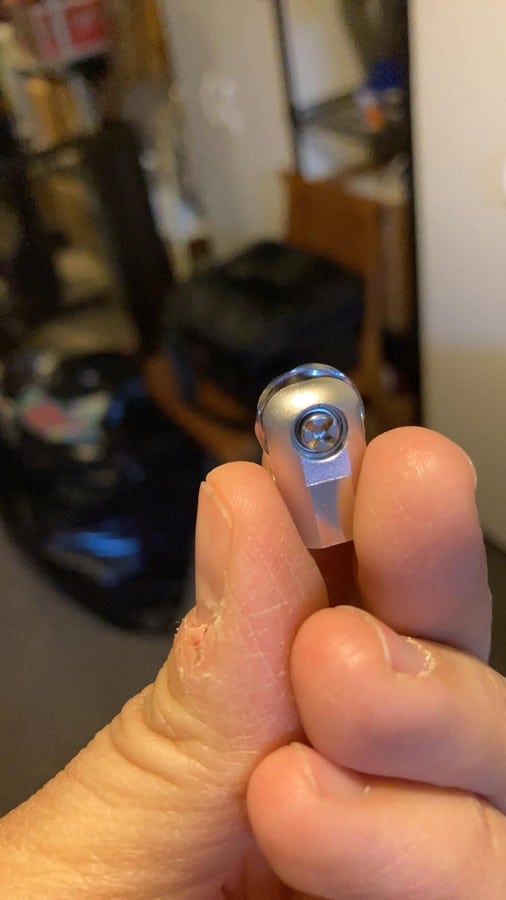
Push the pin 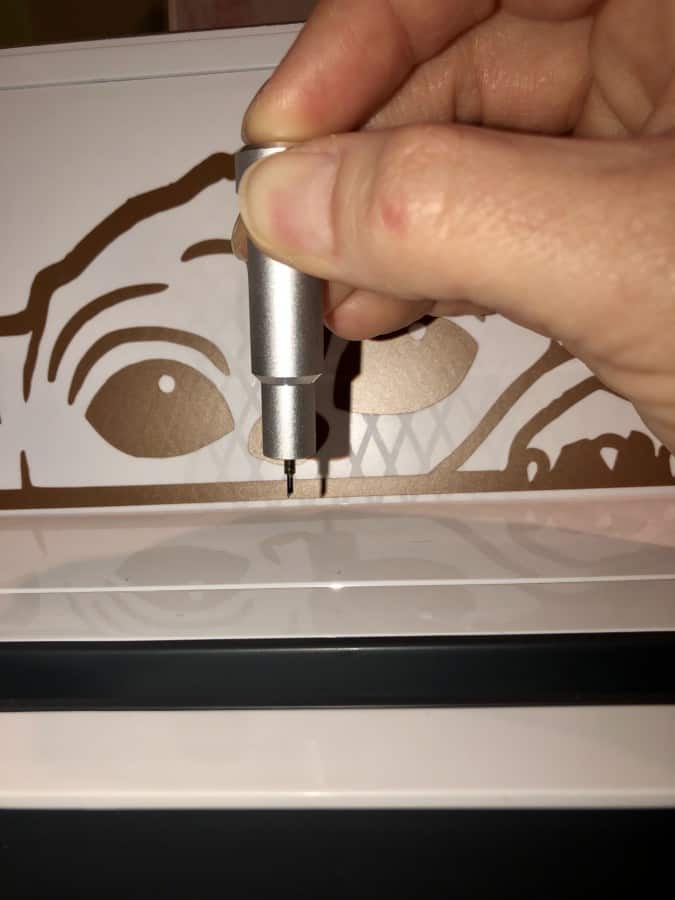
See the tip, grab and pull it out carefully 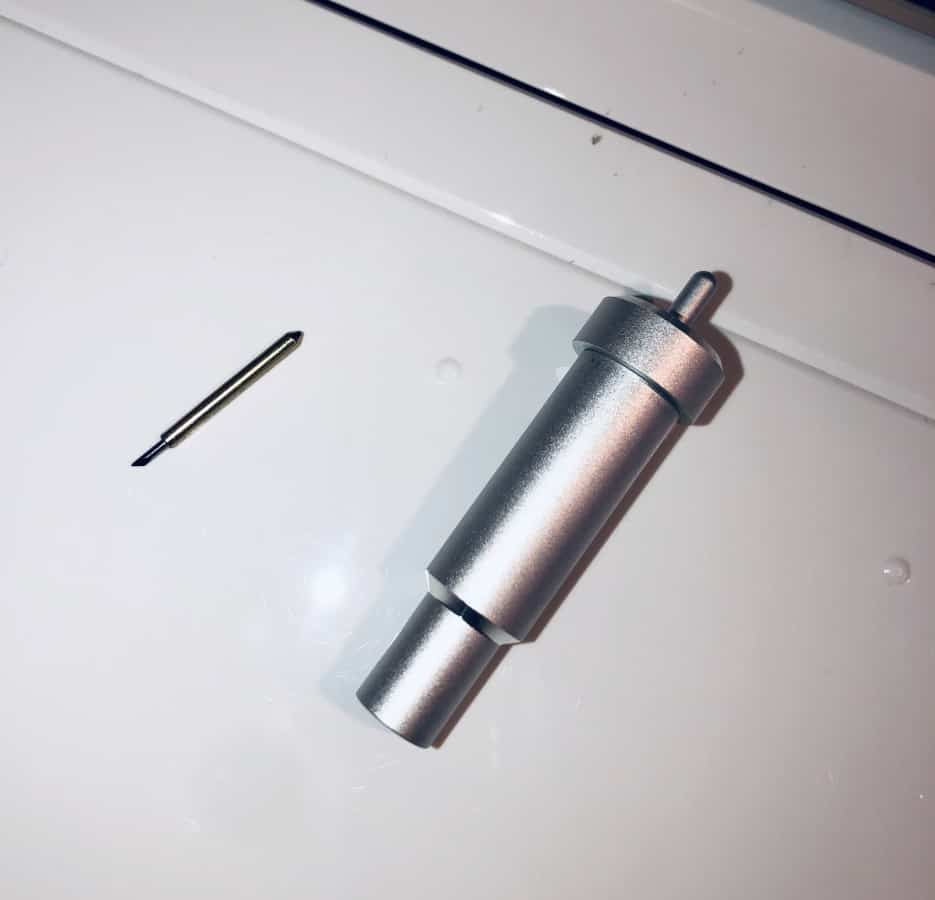
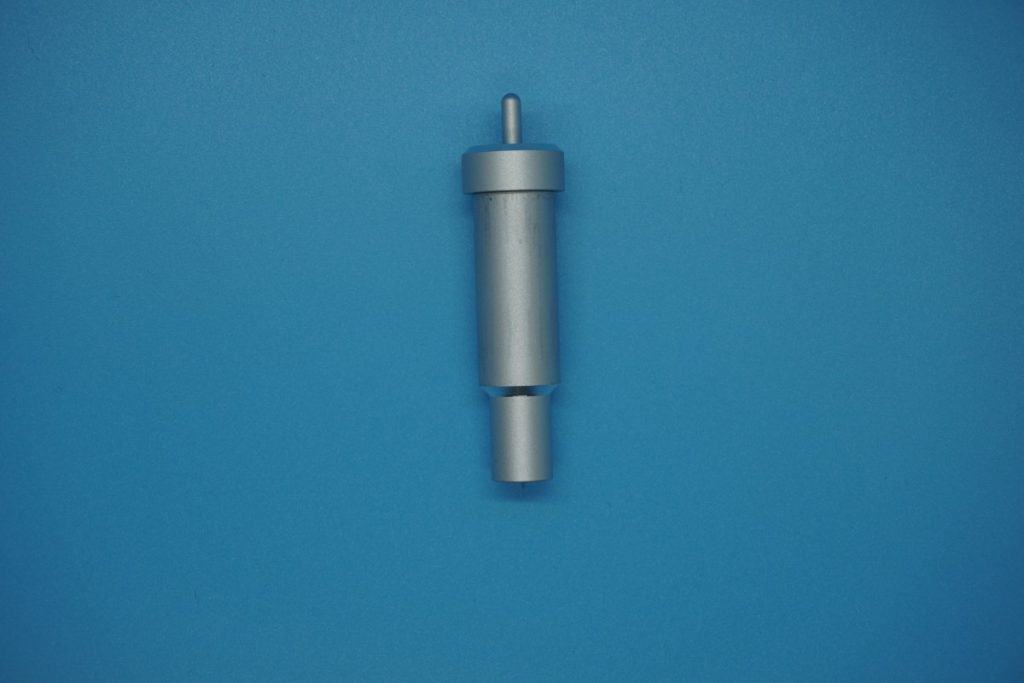
The blade is removed from the housing
I know we just covered a whole lot of information about blades, and some of it may not yet make sense to you. However, it is important to not only understand the difference between these blades but also understand when and how to replace them as well.
Cricut sells replacement blades for a reason, and you do not want to end up stuck in the middle of a project because you did not pay attention to the fact your blade needed to be replaced before you started cutting.
Blades are sharp, and you need to be careful when replacing them and storing any extra blades as well. Blades come with protective covers, and it is important to keep those covers on the blades so that nothing and nobody is accidentally cut.
Blades on your Cricut are almost as important as your designs since, without them, you cannot cut your designs and create your projects. Therefore, you need to make an effort to take care of your blades just as you would anything else on your Cricut.
Be aware that currently, a lot of replacement blades are out of stock (and shipping is delayed) on the Cricut website, so you may have to hunt around. However, I advise you only to use Cricut brand blade replacements, as other brand blades will make it so Cricut will not help fix your machine
However, many Cricut brand products can be found on Amazon or at local craft stores. It is important to make sure you have the blades you need when you need them, so do not delay in purchasing replacements, even if it is just for a “just in case” situation.
Be sure to check out some other nifty functional craft ideas through our other posts here on Craft-ILY as well as checking out some videos on DIY and How To’s over on YouTube. Look for “Crafting Unedited” to see!
Go design, cut, and craft away!
Because of this article, I now know that a perforation blade can cut any foil, cardstock, paper, and more. I would think that any industrial facility would want to use high-quality tools and equipment to perform their tasks efficiently every day. I guess they should look for a trusted company that can offer perforating blades that can handle constant use and can operate smoothly every time to avoid downtime. http://kopessinc.com/tissue-perforating-blades.html
Happy to help! And always happy to see other great companies!