Now that you have mastered (you have haven’t you, if not go back and read my “Guide to using Cricut Infusible Ink Transfer Sheets “STAT) the art of Infusible Ink Transfer Sheets you are ready to move on to using the Cricut Infusible Ink Markers and Pens! In this guide, you will learn what these markers and pens are, what they can do, and how to use them properly.

What are they?
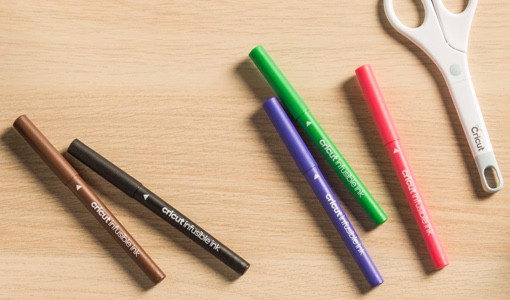
The Cricut Infusible pens and markers are a form of ink that can be infused into a polyester material just like the Cricut Infusible Ink transfer sheets can. Unlike the transfer sheets with the pens and markers you are able to draw free hand or with your Cricut machine to create even more one of a kind images. You are able to obtain a more detailed image as well because you can easily change colors and there is no need for layering! It is kind of like sublimation but in a marker or pen!

How do they work?
The Infusible Ink pens and markers are really neat, they work the same as any other pen or marker with one BIG difference. With regular markers and pens you can write on fabric but when you wash it the ink either washes out completely or fades. With the Infusible Ink markers and pens you are infusing the ink into the materials by pressing them at a high temperature. They will never fade or wash out.
Continue reading to learn how to use them!
What can I use them on?
Well, just like with Infusible Ink transfer sheets you can use them on anything that contains at least 60% polyester. The higher the polyester count the more vibrant your transfer will be. Here are a few examples (with links for easy finding) that you can use the Infusible Ink pens and markers on:
- shirts
- totes
- cups
- coasters
- aluminum sheets
- masks
- socks
- pillows
- blankets
See this post for some really great alternative to using Cricut blanks.
Where can I get some?
As with all Cricut tools, materials, and goodies you can always purchase them on Cricut.com. Cricut is almost always running some sort of sale, sometimes you can catch their half off sales for an even better price. You can also get them at your local craft stores or on Amazon but you will most likely pay more than you would if you purchase through Cricut directly.
How to use them
Now for the fun part, using your Cricut Infusible Ink pens and markers is really easy! First you will need to gather some materials and supplies. Here is the list of what you will need:
- Cricut Maker or Cricut Explore cutting machine
- LightGrip Machine Mat (I use whatever I have on hand because I am a rebel and none of my mats are clean)
- Cricut EasyPress or Heat Press ( I have a Siser Craft Press) DO NOT USE A HOUSEHOLD IRON
- Cricut EasyPress Mat (not needed if you have a heat press)
- Blank (compatible with Infusible Ink, you will see the tag on the Cricut blanks, if you are using a non Cricut blank then just remember that a polyester material is required.)
- Infusible Ink Pens or Markers
- Heat Resistant Tape
- Laser copy paper (2)
- Butcher paper (1)
- Cardstock (80 lb.), White (colored cardstock not recommended)
- Lint roller
- Scissors
- Tweezers
- Design Space software on mobile device or computer
Now that you have all your supplies and materials ready to go we can start the fun!
Design
Since you are using the Infusible Ink pens or markers you don’t have to use Cricut Design Space but it is HIGHLY recommended as you do need to mirror your image still. Not mirroring will cause it to be backwards. For freehand drawing check out my post on using the Infusible Ink pens/markers for freehand drawing.
First you will design your image using Cricut Design Space, then you will select “Draw” in Design Space and assign the colors to your image. Then when you have your image(s) ready you can load your Cricut.
***Tip – if you “flip” your image before you select “make” in Design Space you won’t risk forgetting to mirror it later.
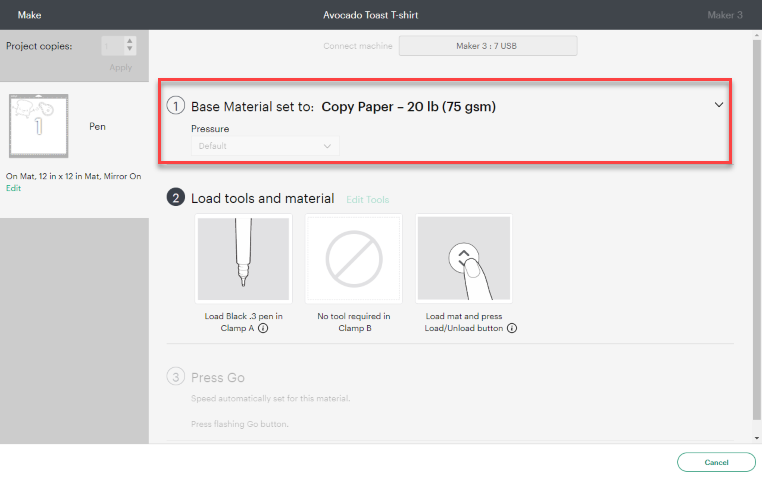
If you have not flipped your image you will want to make sure you have selected “mirror” so that you don’t end up with a reversed decal. Then you will select your materials as seen below:

Next you are going to place a sheet of copy paper on to the LightGrip mat and load the first color pen or marker into the “clamp A” on your Cricut machine and press the “load” button followed by the “start” button. After the first color is completed you will get a prompt in Design Space to insert the next color into the machine. Continue this until your image is complete then unload your mat.
Once your design is all drawn out you will notice that there might be some gaps or spacing in the image or lettering, all you need to do to get rid of this is simply color them in! Who doesn’t love to color anyway right? Also, if you have kiddos this would be a really awesome craft for them to help out with and add their own touch too! Just be sure to layer another sheet of paper under it so it doesn’t bleed.
*** Tip – as always when using Infusible Ink make sure your hands are clean and free of any oils or lotions as this will cause marbling or ghosting of the inks.
Before you start coloring in your image if you choose to do so you should prep your press. You will want to set it at 385 degrees and the timer for 30 seconds (Cricut says 15 seconds but I like to be certain the transfer is set).
*** Tip – Before you press your material you will want to prep it by removing any lint or debris using he lint roller, you will also want to preheat the material as well to get all the moisture out of it.
Press it
Once you have your image colored in and it is ready to go you are ready for pressing. First you will take the sheet of card stock and insert it into the material you are pressing unless you are pressing a coaster or other surface then you will place the cardstock under the material.
*** Tip – if you are pressing a onesie or tote place the cardstock and a piece of cardboard or easy press mat on the inside of the material to lift it a little away from the seams. This will make it a really flat surface which is needed for the Infusible Ink to not have marbling, smears or ghosting.
After you have the card stock in place you can place your image onto your material, face down, and exactly where you want it. Then you will put the heat resistant tape on to hold it in place, I use a lot to avoid any annoyances.
When you are ready with your decal in place go ahead and move your material onto the mat or in place on your heat-press. Then you will take the piece of butcher paper (same size or bigger than the press plate) on top of the image. Now you will press using as much pressure as possible without moving the press at all.
After the timer stops you lift the press VERY CAREFULLY and walk away, let it cool off completely. No less than a 3-minute cool time before touching the transfer.
After the material has completely cooled you are good to go ahead and remove the paper and tape. If you remove before it is cool you will smear the ink and ruin the material.
Now you have a finished product and you are ready to reveal it to the world!
Be sure to check out some other nifty functional craft ideas through our other posts here on Craft-ILY as well as checking out some videos on DIY and How To’s over on YouTube. Look for “Crafting Unedited” or just click the name in blue to see!
