
Infusible Ink Transfer Sheets are a big thing in the Cricut world right now, if you have not gotten on the wagon you definitely should! Not sure what Infusible Ink Transfer Sheets are? I did a whole post on what they are and some really neat project ideas. Check it out here. Basically, Infusible Ink Transfer Sheets are a form of sublimation that Cricut created. Unlike HTV that is glued onto the material, the sheets are 100% ink and the ink is INFUSED into the fibers of polyester materials.
Infusible Ink Transfer Sheets are not like HTV, really the only thing they have in common are they both have to be pressed and even the entire pressing process is completely different. Throughout this post you will learn all about how to properly use Cricut Infusible Ink Transfer Sheets. If you follow my guide you will avoid messes, wasted materials and headaches.
Things you will need
In order to successfully use Cricut Infusible Ink Transfer Sheets or any other Infusible Ink product you need a few things.
Heat Press
This is the most important tool you will need aside from the transfer sheets themselves. Please save yourself a massive headache and money and DO NOT USE a household iron. The issue is that they do not distribute heat evenly at all, for HTV it is not as big of a deal because you can maneuver over your material until it is all applied. With the transfer sheets you can’t move the press at all, doing so will put the transfer at risk of marbling or ghosting. We don’t want that mess.

I have a Siser Craft Press and LOVE it, you can use a Cricut Easy Press as long as the material or image you are pressing is not bigger than the press. Meaning, if you have an Easy Press Mini your design can’t exceed four inches and so forth. The reason for this is because once again you want to have one single press, the less you touch it the better.
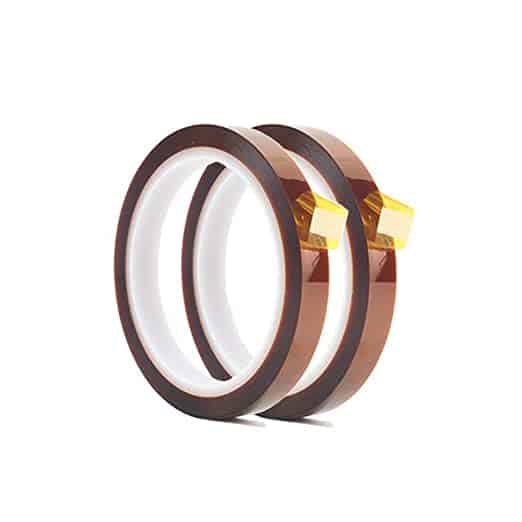
Heat Resistant Tape
Heat resistant tape is a MUST when using Infusible Ink Transfer Sheets. Even though the sheets have a sticky mask you still want to use the tape to keep it in place, again going back to the less you touch it the better.
For example as to what could happen if you do not use the tape…let’s just say you decide to wing it and press without the tape, you have a 50/50 chance that the mask is not going to be sticky enough to stay on your material when you lift the press. If that mask fails and your transfer moves at all the ink will smear and create a marbling or ghost affect to your product, sometimes it looks sweet, most time it looks horrendous and you have wasted a product and materials.
Gloves
Gloves are very handy to use when using Infusible Ink Transfer Sheets. Even if you wash your hands diligently you can still end up with oils from the soap or from touching things on them that can then transfer to your sheets when you are handling the sheets for weeding and what not. I highly recommend just using gloves to avoid the risk.
Butcher Paper
All Cricut Infusible Ink Transfer sheets come with an equal amount of butcher paper sheets to accommodate them. However, they do not account for multiple use sheets, I have never used an entire sheet on one project, I am a scraper (like scraps not scrapes) I salvage EVERYTHING I can from my materials, literally. So one sheet of butcher paper is not enough. I use various types but have found these from Amazon that I like most.
What is the purpose of this butcher paper you might be thinking. Well when you press Infusible Ink onto a blank gasses from the ink are let out and the butcher paper not only absorbs those but it also absorbs any color that may bleed through the paper (if using the markers/pens, more on those in another post), therefore avoiding it getting on your press and onto other projects where we don’t want.
In a pinch I have used cardstock paper to avoid the ink getting on my press but that doesn’t work as well as butcher paper does.
As far as things you need that about covers it, you will also need a Cricut cutting machine (though you could totally just cut some designs by hand if you really wanted to, but having a Cricut is SO MUCH FUN!)
Getting started
When you have all your materials and supplies all ready to go you can start designing your project, or you can do it the other way design then gather all the things. I like to physically see what the Infusible Ink will look like first then imagine it on an image then apply it to a design.
The first thing you will do is log into Cricut Design Space and start creating your image. A big tip that I wish I would have known prior to starting my first project with Infusible Ink transfer sheets is that it has a similar texture to cardstock, therefore small details and lines do not weed very well nor easily. So if you are creating an intricate design pay caution when you begin weeding it.
Once you have your image designed and are ready to cut then you will prep your Infusible Ink transfer sheets, I wait until the last minute to handle them, mainly to avoid any issues.
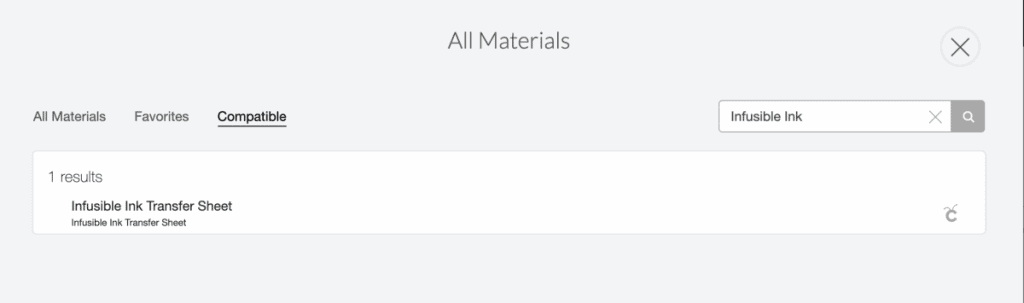
Selecting Material
After you have your design ready you will go into the materials selection. If you have an Explore family machine you will set your dial to “custom” then go into Design Space and search “Infusible Ink Transfer Sheet”. If you have the Maker or Joy you will just go to the search bar and type the same thing “Infusible Ink Transfer Sheet”.
You WILL need to mirror your design, just as you do with normal iron on vinyl. At first I thought it was like the patterned iron on where you do not mirror the image but I was wrong. Make a note somewhere near your computer screen or machine to MIRROR YOUR IMAGE, just trust me I have made the mistake of forgetting many times.
Ready to cut
Now after all of that prep work you are ready to cut your design! Press that go button and let the machine do it’s thing. While your Cricut does all the hard work of cutting you the perfect image you can prep your heat press and materials (we will cover that in a moment). After it has been cut you will weed the image.
To weed it you simply bend the mask a little, I like to kind of roll it up a little to loosen it then start peeling out the negative space. You do not need a weeding tool for this, again, it is like cardstock material.
Pressing
While your Cricut is cutting go ahead and start up your press, you will set it to 385 degrees and for a time of 40s. When your press is at temperature you will need to prepress your material. The reason for this is to remove any moisture and wrinkles/creases from the material so that you have a dry and smooth surface to press on.
Design is cut and weeded, press is hat and material is prepped – let’s press it! take your image and some heat resistant tape and secure it to your material, making sure that it is not going to budge. Then you will place the butcher paper on top of the material covering the entire image.
Next you can put the press on your material, if you are using a regular heat press push down, set the time and step away. If you are using an Easy Press, press with all your might (but careful not to move your press at all) and keep pressing until that timer goes off. Once it beeps gently remove the press from your material and walk away. It needs to be completely cool before you remove the mask to avoid any smearing.
After about five minutes return to your press and remove the mask from your material to reveal your work of art!
Once you have revealed your work you can use your new project, however refrain from washing or getting it wet for at least 24 hours. This will give the ink plenty of time to really set into the material.
Now that you have a full guide to using Cricut’s Infusible Ink Transfer Sheets, go get to creating some beautiful things!
Be sure to check out some other nifty functional craft ideas through our other posts here on Craft-ILY as well as checking out some videos on DIY and How To’s over on YouTube. Look for “Crafting Unedited” to see!