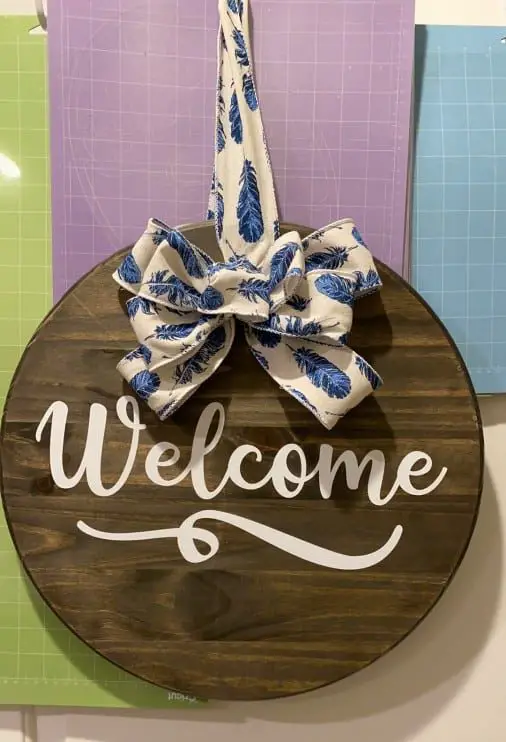
If you have been on Pinterest or even Facebook you have seen these gorgeous wooden porch signs all over, heck you have probably seen them on your neighbors front doors. Wood signs are crazy popular and have been for sometime. I recently became obsessed with making them and I wanted to share the steps of how to make wooden sign with you.
Ready for a little DIY project? You will need some supplies first and a run to your local hardware store or even just a click on over to Amazon for most of what you need.
Time to shop
Here is a list of the items I use when creating a wood sign, these are my personal preference and only products that I know work well and have really good quality for not so much dough.
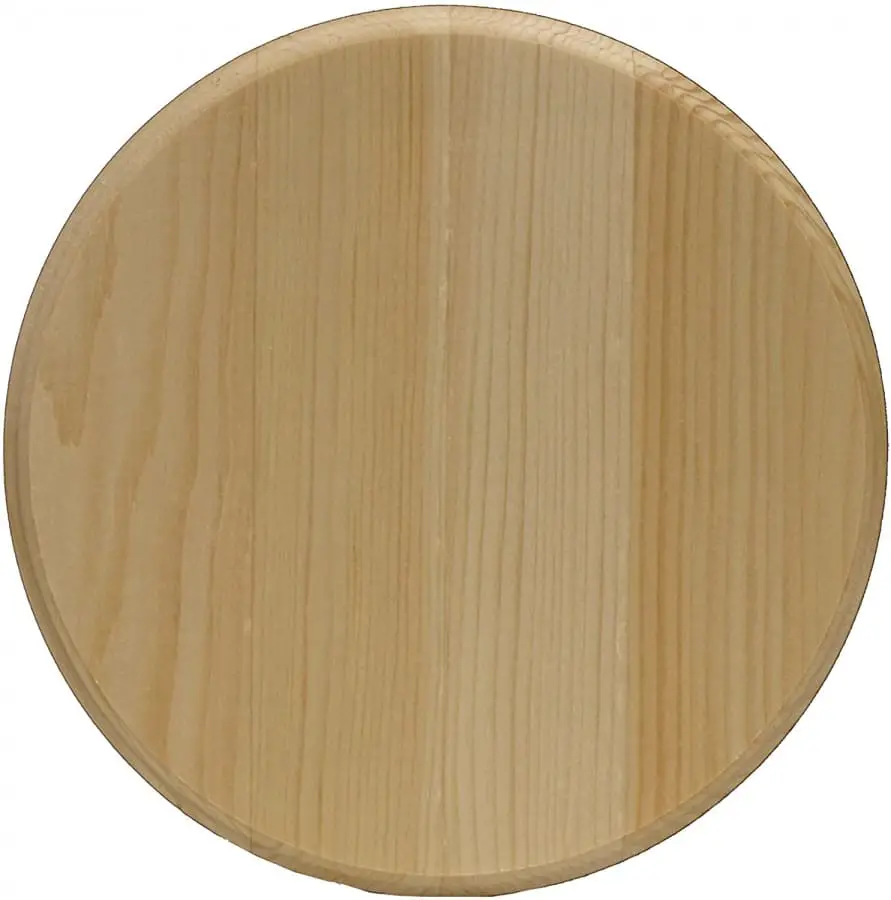
- Wood for your sign – I get mine mostly from hubby’s wood room but when I need a specific one or one in a pinch and he doesn’t have on prepped I resort to these from Amazon. Great blanks and you don’t have to leave your house!
- Stain or Paint – If you plan to stain or paint your sign you will want to make sure you get a good stain or paint. Acrylic paint absorbs into the wood so make sure you have enough to do many layers of paint if you plan to use acrylic.
-Paint I would highly recommend using outdoor paint if you are planning on using your sign outside, like on your door or porch so that it can withstand the elements better. If it is an indoor sign I would recommend using indoor or even acrylic paint. If you are staining your sign you will only need paint if you are planning to do a stencil and not just using vinyl. I prefer to use vinyl.
-Stain I really like using Minwax products, their stain is awesome and knocks out two steps at once. In my YouTube tutorial of how to make a sign I used a stain from Sherwin Williams because I had the color and it matches our new hardwood floors. Minwax has the polyurethane coating in the stain so you do not have to wait three to four days before you can get to finishing your project! I can’t wait that long haha!
- Vinyl – whether you plan to use a stencil or just vinyl on your sign you will need some sort of vinyl (the stencil method I use is vinyl). For my outdoor signs I use Oracal 651 and for indoor signs, use either HTV (iron-on) or permanent adhesive vinyl. The Oracal 651 will withstand weathering without having to add a sealer over it and the HTV or permanent adhesive vinyl will be fine indoors.
- To go with your vinyl you will need transfer tape, I use Con-Tact brand contact paper.
- Polyurethane coating – If you are using a stain that is not an all in one you need this especially if you are leaving it outside in the crazy weather conditions. This will help seal the wood avoiding any moisture from getting in.
- Gloves to protect your nails, skin, and jewelry from getting stained or painted.
- Imagination – of course, you need this! If you have a Cricut you will need that and Design Space as well. If not then you will need to have someone make you a decal or stencil. You can also always get you a Cricut cutting machine! Cricut.com is always running amazing deals on their machines, I recommend the Maker but if you don’t have the funds the Joy or Explore are also fantastic machines.
- A workspace that you don’t mind it getting messy.
That should complete your shopping list. Now that you have all you need and probably more (if you are like me you can’t just run into a craft store without coming home broke) you are ready to get started on your wood sign.
Step One
The first step in the process is prep-work, you are going to want to make sure you have everything set up and ready to nail this project. As Benjamin Franklin once said “By failing to prepare you are preparing to fail”, if you aren’t prepared with everything you need this could turn into a nightmare. So here are a few tips to get you started:
- Make sure your work area is available for the next 72+ hours. This process takes time between steps in order to allow dry time for your stain and/or paint. I usually allow no less than 24 solid hours between staining and applying my vinyl. We will cover more in step 2.
- have ample amounts of gloves, one or two will not get you by, trust me. If you only have a couple I would make sure you are adamant on cleaning them off before touching your freshly stained board or anything else for that matter.
- If you are like me and super sensitive to smells like a stain/paint you will want to work in a well-ventilated area and possibly wear a mask. I get crazy migraines from the smallest scent.
- I like to use an old Dollar Tree table cloth to cover my work area to prevent any mishaps.
- Take your time and most importantly have fun!
Step Two – Stain or Paint
Now we are ready to get moving on the real work! This step is actually step one divided. We are ready to stain or paint your wood.
Before you stain or paint you want to take a cloth over your wood blank and wipe any debris off of it, then follow through with a lint roller just in case. When I explained this to a few individuals they had never heard of taking a lint roller to it and I will tell you all the light bulbs went off! Lint, hair, and other fuzzies can turn this project on its head really quickly so we want to avoid them.
Basically you will need two cloths, one for wiping debris and one for wiping the stain. If you prefer to use a brush for your stain then you will only need one cloth or if you are painting you will just need one cloth.
Now to start staining!
Once your wood is ready to go all you need to do is put on your gloves, give your stain a good shake (with the lid on of course!) and open it up. Take a cloth and dip it into the stain then just rub the stained cloth onto your wood. Repeat this process until one side and the edges have been covered. DO NOT wipe it off yet!! Wait at least ten minutes to wipe the excess stain off, if you do it right after you are wasting stain that didn’t have the chance to seep into the wood.
After about ten minutes you can wipe the excess off and let it sit for a minimum of 12 hours. After the time has passed you can then flip it and do the second side repeating the exact same steps.
Or paint!
If you are painting your wood and not staining it you will want to follow the same steps as staining with the exception of you will use a brush instead of a cloth. If my sign is going to be outdoors at all I prefer to use outdoor paint so that it won’t flake or fade as quickly. If it is for indoor use I will use whatever acrylic paint I have or can find on sale. Amazon is a great place to get your acrylic paints for an inexpensive price.
Whether staining or painting your wood you will want to make sure you have let it dry long enough. I always try to let my signs sit for a day or two after stain or paint is applied, this is for two reasons.
- To make sure it is fully dried so that my vinyl will stick to both the stain/paint and the wood. If you don’t allow it to dry and you apply vinyl you could end up ruining the adhesive on your vinyl and it won’t last as long.
- To make sure I am truly satisfied with the color choice. After you let the satin or paint sit for a day or so you will see the true color, sometimes it is much lighter or darker than you expected and at this point it is sometimes able to be changed. Once you apply vinyl it is much more difficult to change.
Protect your wood
Next up, you need to protect your wood with a polyurethane sealant. This sealant will help protect your sign from moisture, if you are using an edge-glued blank then you most definitely do not want to skip this step.
Edge glued means that the edges of several pieces of wood were glued together in order to make the shape or size of wood blank you are using. When they do this sometimes the edges aren’t glued thoroughly and can cause some openings which moisture can make its way into and rot your sign from the inside out. This is why sealing it with the polyurethane coat is best.
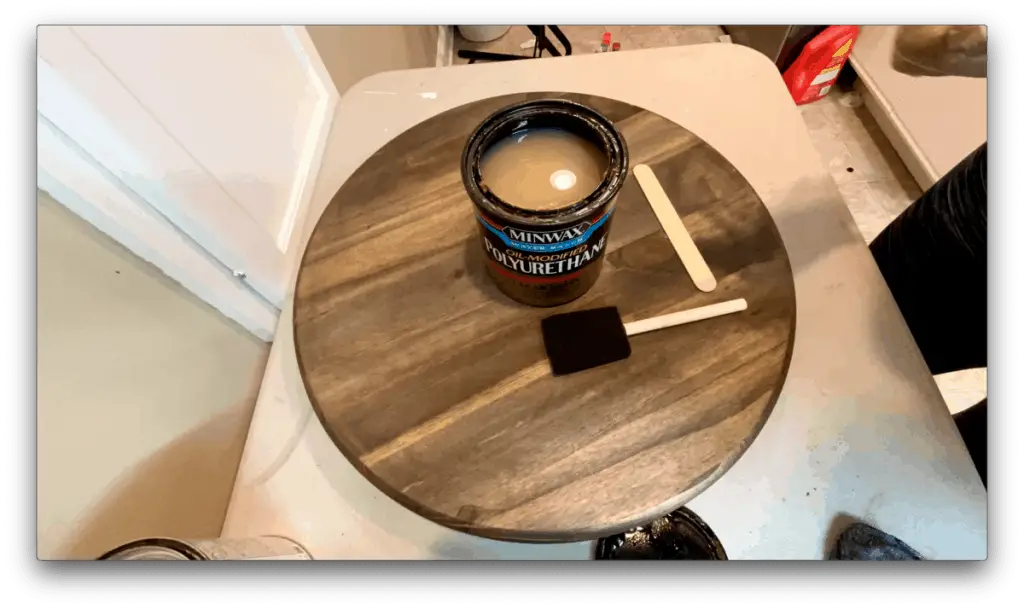
The best way to use the polyurethane is to apply the same as a stain but DO NOT SHAKE the can! Gently stir it lo mix up any settling, then take a foam brush and apply a thin layer, you can repeat this for a second coat if you want but you will need to sand it some to give the second coat something to stick to.
Ready to add a design!
Now that your wood is all sealed and beautiful you are ready to apply your design. Before you apply you want to always make sure your surface is clear from any debris, so just as you did in the beginning take a cloth wipe it down, and follow with a lint roller.
To apply a vinyl decal:
- Make sure your decal is ready to go before you put it anywhere near your sign. You can see a detailed tutorial on prepping your vinyl in this post on making a wall decal.
- Remove the backing of your decal slowly
- With the decal facing sticky side out fold it in half but not all the way, just enough to you have an idea of where the center lies. Depending on which is bigger you will fold in half lengthwise or widthwise.
- Starting from the center of your decal and the center of your sign (or wherever you want it) gently set the decal onto your sign.
- Start with one side (sometimes you need a third hand for these so ask for help) and gently guide the decal down onto the sign and repeat for the other side.
- Now take your scraper tool and gently push the decal down WITH THE TRANSFER TAPE STILL ON. The transfer tape will protect your vinyl from scratches.
- Gently peel the transfer tape away from your decal
- Now you have a beautiful design!
TIP- if you don’t have a helper and your decal is large peel off the backing, cut it in half and reapply it to the decal. Then you can do the steps without ruining one side of your decal or getting frustrated because it keeps sticking to you.
To use the stencil method:
Don’t. Personal preference here. Normally I would walk you through how to do a method like this and I would love to, I just have not had any success with using the stencil method on wood. I also do not like the way the paint looks compared to vinyl. Vinyl is much more vibrant and has fine lines.
IF you decide to give it a go here is what you do in short:
- Using Oracal 631 masking vinyl you will have created a design already so you just lay the stencil onto your sign using the same method mentioned above for applying the vinyl. I have heard some crafters use a little Mod Podge to avoid any seeping of the paint.
- Dab your paint into the outline of your stencil. If you stroke the brush you will likely have some paint seep through the stencil.
- Let it dry completely before pulling up the stencil, a solid hour or two.
- Pull the stencil up and reveal your design
Now you are ready to add more flare by adding a bow, ribbon, burlap, or whatever fun stuff you can find! Before you know it you will have a house full of signs!
Now get out there and start making signs!
Follow me for money and time-saving tricks so your wallet doesn’t go completely empty in this hobby.
Be sure to check out some other nifty functional craft ideas through our other posts here on Craft-ILY as well as checking out some videos on DIY and How To’s over on YouTube. Look for “Crafting Unedited” to see!