Now that you have your Cricut cutting machine you are probably in the mindset of “I want to make everything” and have been on Pinterest so much that you are on the verge of getting fired from your day job. Creating fun and unique Mugs and other glassware is one of the most popular Cricut crafts out there aside from t-shirts that is.
Today you are going to learn not only how to personalize a mug with vinyl but also all of my tips and tricks I have learned over the years. At the end you will also get a free image to get you started on your mug making!
I have to admit, I love coffee mugs and shot glasses. I have more of them than I do any other dish in my home, seriously. Anytime I go somewhere away from home I must get one or the other and sometimes both. Now that I can make my own I don’t get upset if something happens and I don’t get one (usually because I wait until the last day of the trip to get it so I don’t break or lose it and I end up not having time to get one I like) I can make my own with a memory from wherever I was.
As with any project, you are going to need a few supplies to get you going on making personalized mugs. Here is a list of the products that I use.
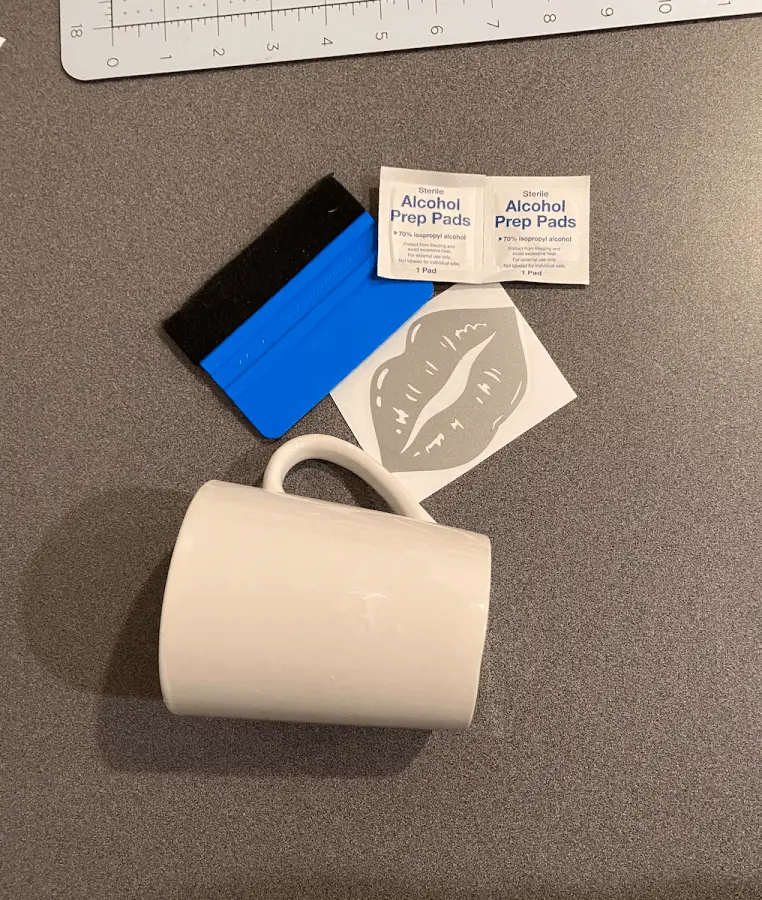
- Blank mug – I use mugs from the Dollar Tree and Amazon, it really depends on the urgency of the project/order. Dollar Tree mugs are great and for just a buck you can’t beat it. Just be sure to inspect the mug as most of them do have flaws.
- Felt sided scraper tool
- Alcohol or alcohol prep pads
- Permanent vinyl decal
Gather all of your supplies and get ready to create something great!
Create
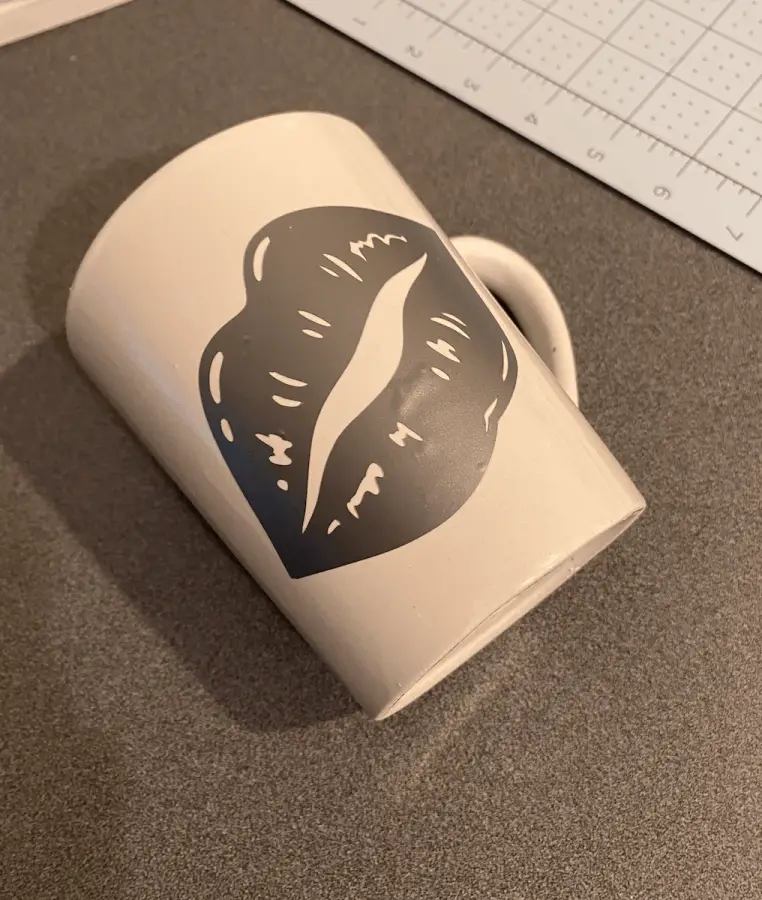
The very first thing you will want to do is create or buy a vinyl decal. The vinyl should be permanent adhesive vinyl, it can be removable but that will not last as long as permanent will. Permanent vinyl will last through hand washing, warm soapy water and some roughing up. Removable definitely won’t last more than a couple months or so.
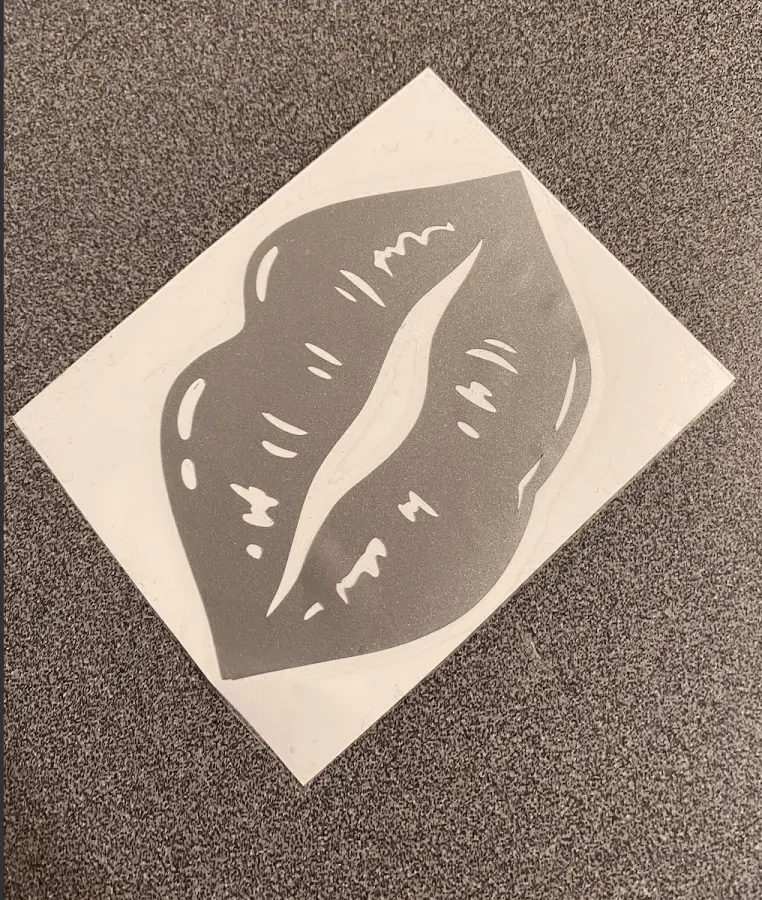
You can make it whatever you want! Let your imagination free on this. However, I do recommend you keep it simple if this is your first rodeo. The more complex your image is the more layers and work it will be. If you want something more detailed then I would recommend using a waterslide or print then cut decal. Be on the lookout for posts on those soon.
You can also opt to have your decal made for you, if you don’t have a Cricut or Silouhette. I offer vinyl decals in my shop for everyone. Check it out here.
Now once you have your decal all ready to go you can get your mug prepped.
Mug Prep
Prepping your mug is the easiest but most important part of this craft. Why, you might ask? If you do not prep your cup then the oils and residues from fingerprints and other things touching your mug will cause it to break down the adhesive on the back of your decal. Which in turn will cause it not to stick as long. If you prep your mug right your decal should last years!
Now to prep your mug! Using either 70% rubbing alcohol or the prep pads I typically use the pads, mainly because they are easier to find these days and then I don’t have to worry about any fuzzies being left behind from a paper towel. Either works fine.
Take your alcohol and wipe down the surface where you plan to apply your decal. Give it a good rub down, making sure you get it wiped good. When you are done let it sit for a minute or two, letting it dry out.
Your mug is prepped and ready for you to make it personal!
Apply the Decal
Now for the main event, the reason you’re reading this post. Time to apply your decal!
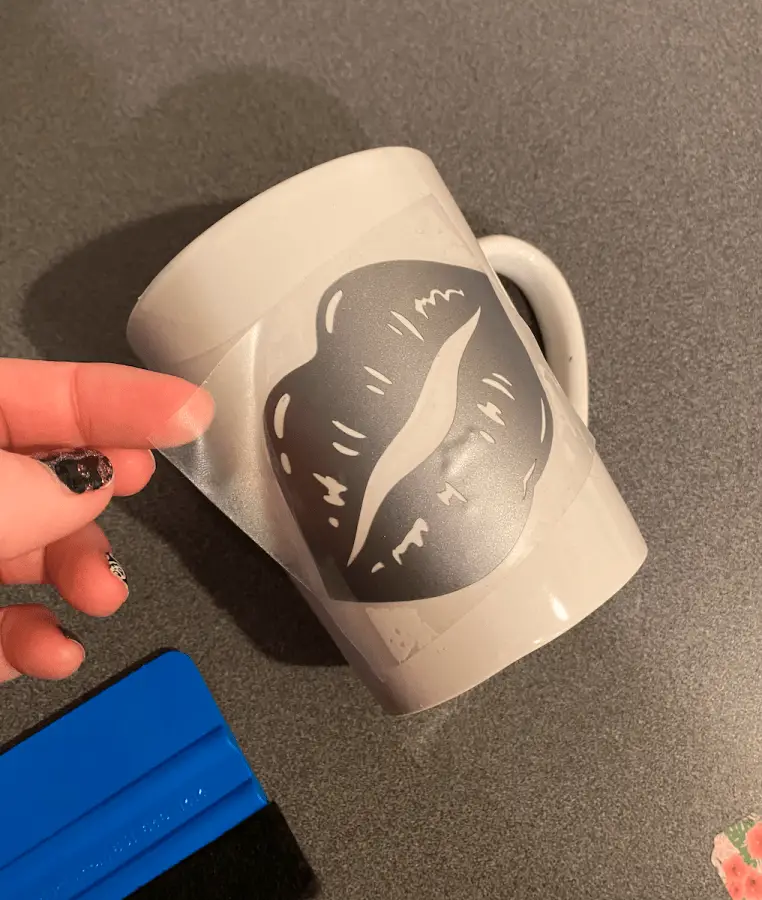
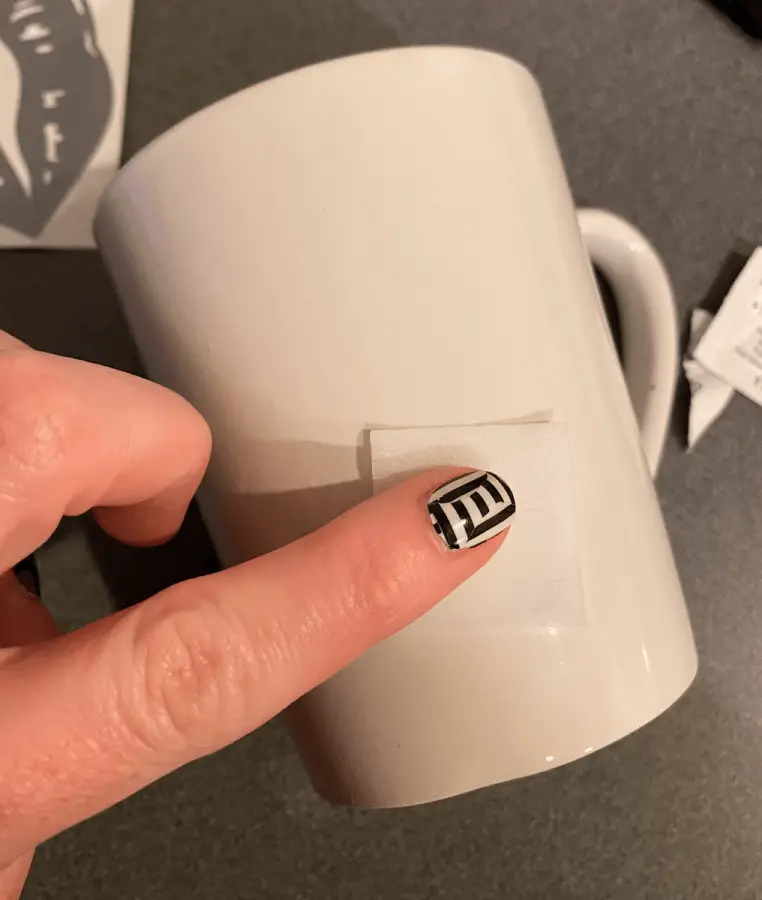
You will want to have your decal prepped with transfer tape or contact paper (that’s what I use). You can see my other posts on that here. Once you have that you will simply pull it off of the backing and place the center of your decal onto the mug. Doing it this way will help prevent creasing and what not. As you lay the decal down apply a small amount of pressure to the decal, starting from the middle and moving to one side then the other.
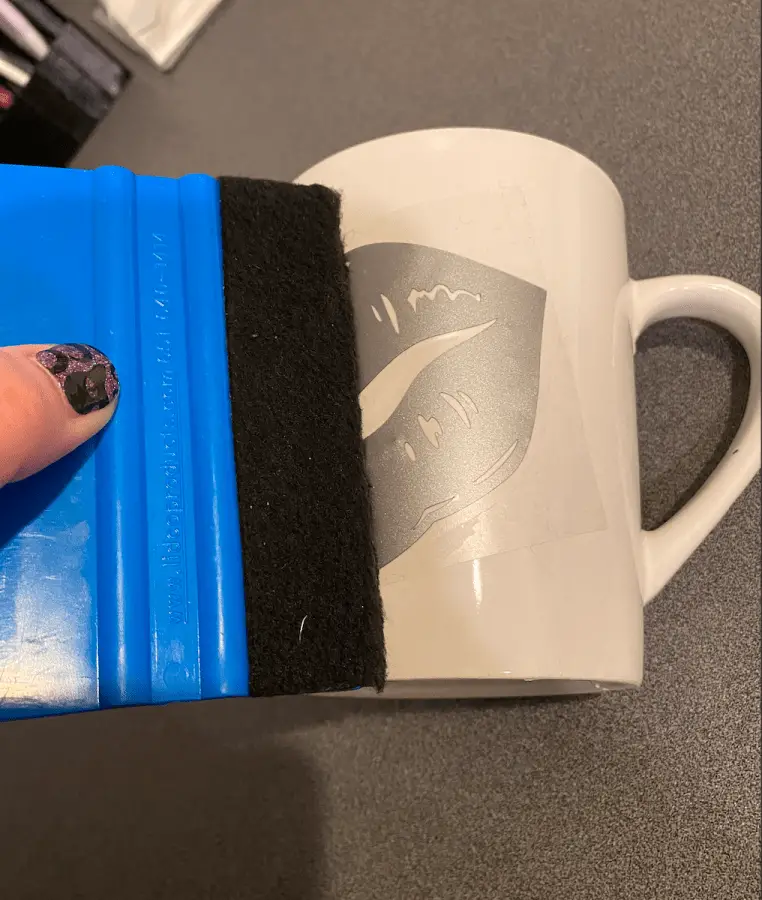
Once you have your decal in place where you want it you can remove the transfer tape. Be sure to do this slowly to avoid air bubbles, you can also take your scraper tool and apply some pressure as you pull off the tape.
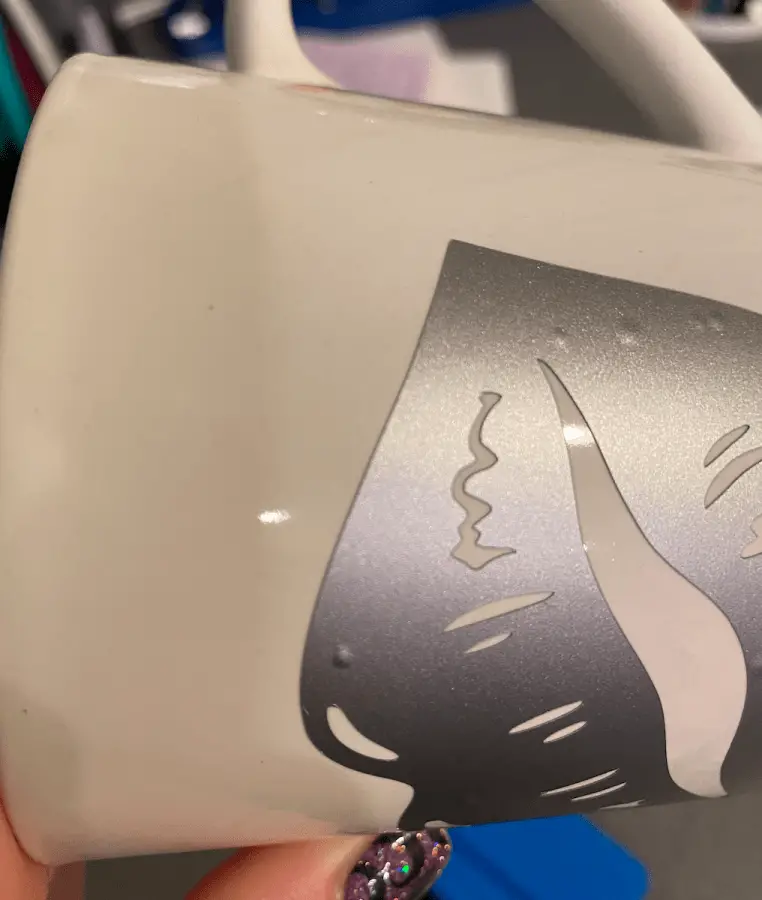
As you are smoothing the decal down you may see air bubbles in the decal and this is normal. Air bubbles are created by air being trapped under the decal, it is a super easy fix. If this happens you can do one of two things. Option one is to poke a small hole in the center of the air bubble then press the bubble into the hole. Option two is to take a heat gun to the decal and lightly go over it applying pressure while it is warm, this is where the scraper tool will come in handy.
The Final Reveal
Now your mug is prepped, your amazing decal is on and you are ready to reveal your new mug to the world! Now remember you can not put these in the dishwasher, the high temperature of the water, the soap and the pressure of the sprayers will definitely cause it to peel up.
Take lots of pictures, post them on all of your social media and have the BEST coffee out of your newest addition to you mug collection. Or you can even put it up for sale and make a little money from it!
Be sure to check out some other nifty functional craft ideas through our other posts here on Craft-ILY as well as checking out some videos on DIY and How To’s over on YouTube. Look for “Crafting Unedited” to see!