Design Space is amazing for many reason, the primary being that it is so easy to use. Even if you have the most basic of knowledge in computers and technology you can do so much using Cricut Design Space.
Tumblers are amongst the top products in the crafting industry, primarily because they are used more often than most products like shirts and what not, you can use a tumbler all day everyday but not wear a shirt everyday.
Using Cricut Design Space to create tumblers wraps is one of the easiest methods available. You can create a one of a kind wrap for wither sublimation or vinyl in just a few steps. To make yours follow these steps:
- Measure your tumbler – circumference and height
- Load a rectangle shape in Cricut Design Space
- Unlock the size and resize to what you need it to be
- Create your design using whatever images, sayings or names you want
- Place the images onto the rectangle however you wish
- Remove the rectangle and select all of the images and click “weld” for vinyl or “flatten” for sublimation
- Click “make it” and mirror for sublimation don’t for vinyl
- Cut or print your unique wrap
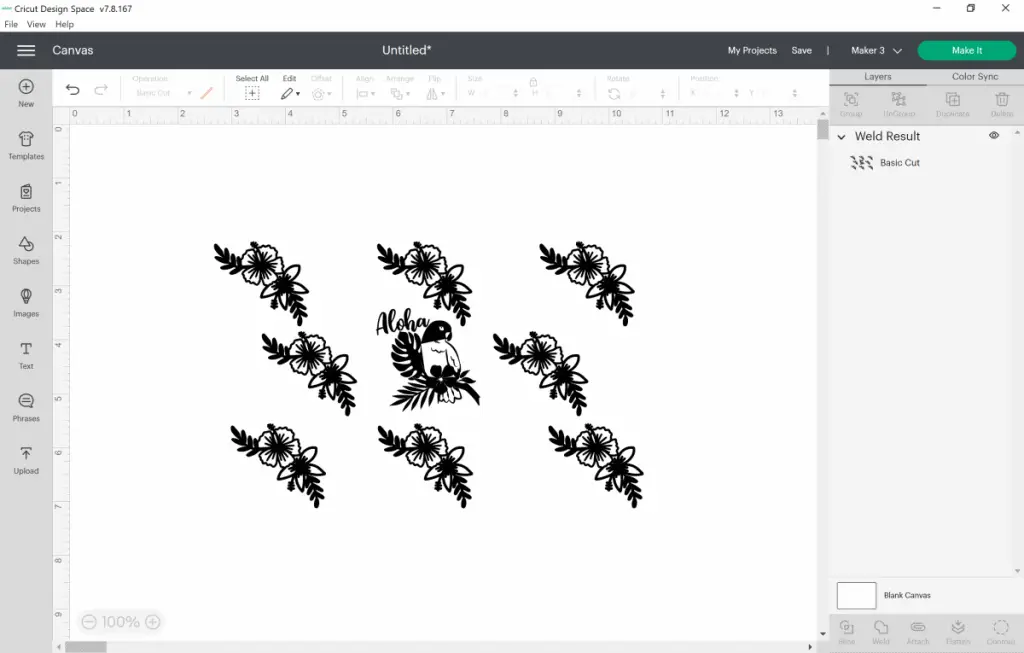
Just like that you will have yourself a really personal and unique tumbler wrap. As with most all crafting projects there are additional step, tips and tricks to follow and utilize so keep reading to learn more.
What is a Tumbler Wrap?
Before digging more into the how let’s cover a bit about what a tumbler wrap is. If you have been in the crafting world for a bit you know what it is but if not there is a chance you are a little bit lost.
Creating tumbler wrap is how you are able to have an image “wrap” all the way around the cup almost seamlessly. You can also do this by just cutting and places pieces here and there but this, once you get this process it will be so much more effective and efficient.
What Do I Need to Make a Tumbler Wrap?
The materials needed to make a tumbler wrap depend on what type of tumbler you are making. There are two main types of tumbler wraps sublimation and vinyl. Here is what is needed for each:
Sublimation:
- Sublimation printer, with sublimation ink and paper.
- Tumbler heat press or sublimation oven
- Butcher paper or sublimation sleeves
- Cricut Design Space
- Fabric tape measure
Vinyl:
- Permanent vinyl
- Transfer tape
- Rubbing alcohol
- Cricut Design Space
- Fabric tape measure
As you can see there are some of the same materials needed but there are also several different materials needed as well.
How to Make A Tumbler Wrap
Now for the important stuff, everything you need to know and more about how to make a tumbler wrap using Cricut Design Space. Once you have the materials for your project you are ready to get started.
Measure the Tumbler
The very first thing you want to do is to measure the tumbler you will be using. If you don’t measure the tumbler you will end up short or having too much material, either way doesn’t end well. Measuring the tumbler is easy and important.
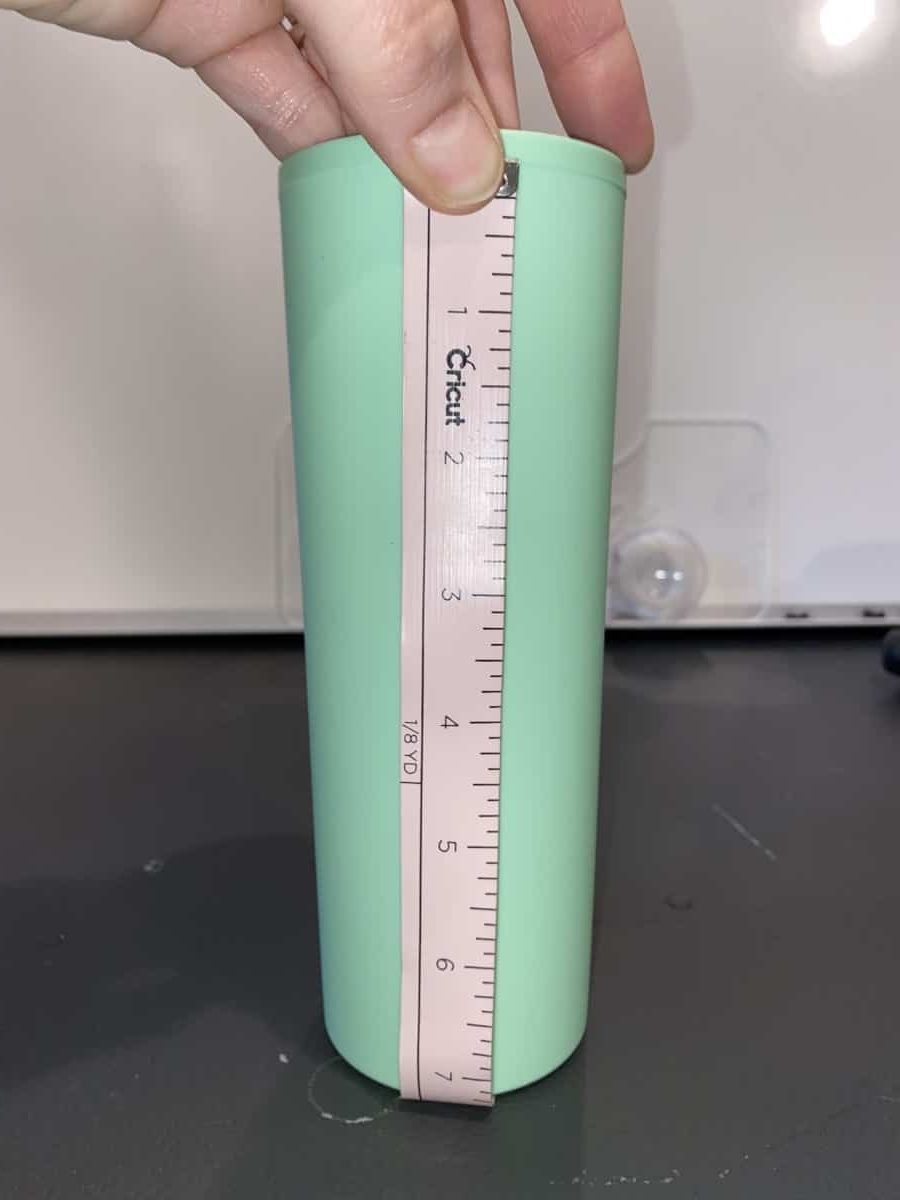
Measure the tumbler height, it is best to measure the flat surface of the tumbler, leaving any curves out of the measurement. This is especially true for sublimation, vinyl too if it is a small or tight curve.
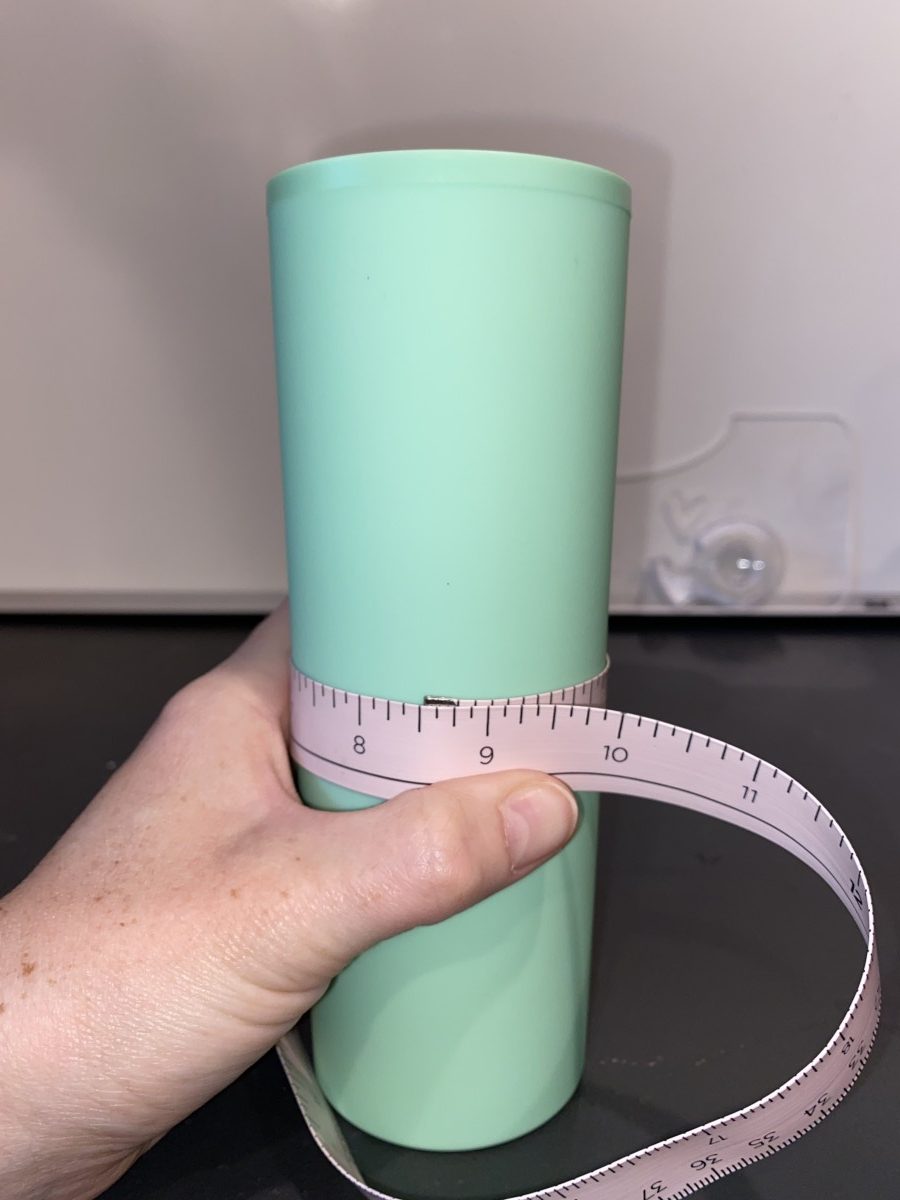
Next measure the circumference, wrap the measuring tape around the tumbler getting it as close and as tight as you can to the base. Then use the number that connects the beginning to the end as your final number. If your tumbler has a handle measure from one side of the handle to the other.
Write your two numbers down. Open the Cricut Design Space.
Make a Faux Template
The second step is to make a faux template in Cricut Design Space. Open Cricut Design Space and create a new project and then open shapes and select a rectangle. Take the measurements you gathered and enter them into the size tool. You will have to unlock the tool first otherwise it will automatically adjust based on what you put into and it will mess everything up.
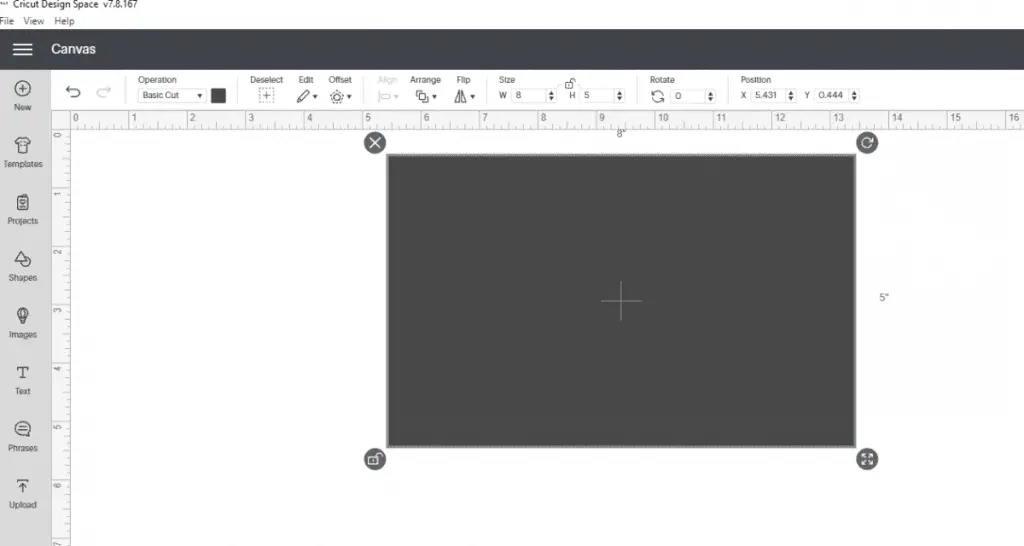
After you are done with that you can chance the color to whatever you want. White and black are generally the best colors unless you are doing a sublimation wrap and you want a background for your image.
Select your Images
The next step is to find the images you want to use, you can use images, quotes, whatever you want. Select them and arrange however you would like keeping in mind the sizing. Lay them out on the rectangle in the design you want. The trick here will be to remember to position the rectangle in the back.
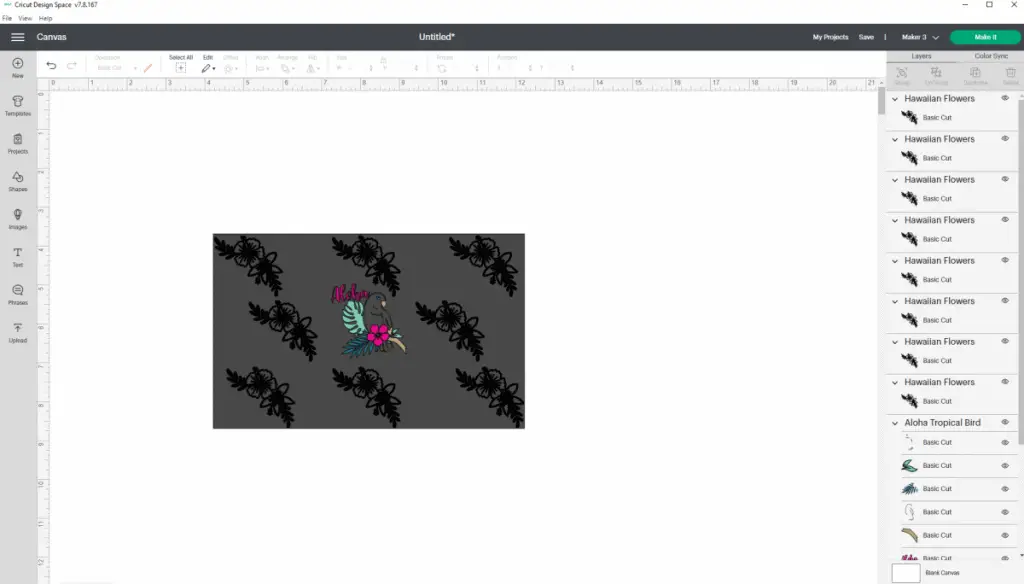
After you get the images the way you want them on the faux template and when you have them how you want them you are ready for the last step.
Attach the Images
Now that the image is how you want it you are ready to weld or flatten them to prepare for the making process. The steps for vinyl are different than the steps for sublimation.

For Vinyl:
Remove the faux template from the area around the images and select “weld” this will force Design Space to keep the cuts as is and will not place them however. The wrap will cut the way it will be placed on the tumbler.
You will select your material and prep for cutting, for vinyl there is no need to mirror your image, just hit the go button on your Cricut and your off.
For Sublimation:
Keep the faux template if you are using it as a background or remove it if you are not. Select all the images and the background and then select “flatten”. This will keep the image the exact way you want it and if you want it to Design Space will tell your Cricut to cut the exact area around the image.
You do need to mirror for sublimation and you will need to select the sublimation printer and then click “send to printer”
Here is a video on how to make a full tumbler wrap as well as how to apply it:
All Done!
You are now a pro at making full tumbler wraps in Cricut Design Space and you know how to creatthe faux template too! This article covered all of it for you.
Creating a full tumbler wrap template
Creating a full tumbler wrap for vinyl and sublimation
All you need to do now is apply those skills and make your own full tumbler wraps and unique tumblers.
Be sure to check out some other nifty functional craft ideas through our other posts here on Craft-ILY as well as checking out some videos on DIY and How To’s over on YouTube. Look for “Crafting Unedited” or just click the name in blue to see!
