When it comes to creating images and designs our creative brains flow quickly, when we get the juices flowing we need a software that can keep up. Cricut Design Space is great for the most part for designing but it has its flaws. One of the most common annoyances I see creators having is getting these notifications:


Most of us don’t even notice it until we go to make our project and then Design Space yells at you, but the thing most don’t realize is, Design Space actually tells you exactly why it will not allow you to continue. Let’s dig in a little more here.
Cricut is phenomenal when it comes to hardware, like they really hit the nail on the head with their machines, but when it came to software they seem to have missed the nail. Design Space is great until or you get one of the messages or flags mentioned above bombing on your creative flow. It can become very frustrating.
I am going to help you understand why these messages pop up as well as how to correct or work around them.
Why is the message a thing?
The main question that I get asked and see everywhere is WHY is this message even a thing? Short answer is because the image is too large for the Cricut guidelines, those are 9.25in x 6.75in which is barely large enough for a medium shirt decal.
The reason Cricut and even Silhouette have this “image size guideline” is because the machines need space to print the registration marks for the machine to read before it cuts. Sounds ridiculous I know. While it may suck to have these restrictions they are necessary for now.
Cricut is continuously improving the way they do things, they are listening to their loyal customers. They hear us! In the mean time here are a few tips as well as some hacks and work arounds that can ease your stress!
How to get rid of the message
If the message pops up look at the size of your image, does it ft within the restricted size of 9.25 x 6.75 or vice versa? If not adjust the size to fit the restriction.
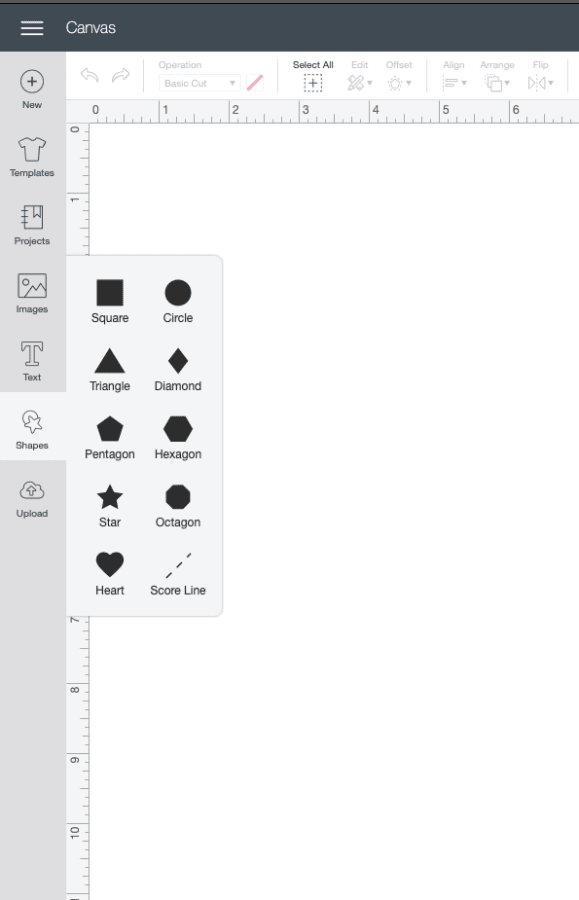
Tip – go to shapes in the left tool bar and select a square, then unlock it so that you can change the shape to a rectangle. At the top where you see the “size” adjust it to either 6.75 x9.25 or 9.25 x 6.75 whichever works for your image. Then place your image on top of the rectangle and stretch or reduce to the edges. I mean get it as close as you can to those lines. Push the limits! Remove the rectangle, then select make it and you will see that it is going to take up almost the whole page!
Need it to be bigger?
Believe it or not there is a work around for this as well. However, just be cautious and if you are selling the item you are making let the customer you there will be a seam so if the material is stretched out it will be visible. Also, for fitted shirts you want to try to make sure the image is a tad bigger than you normally make it. This way the seam has less chance in peaking through.
Heres how you do it:
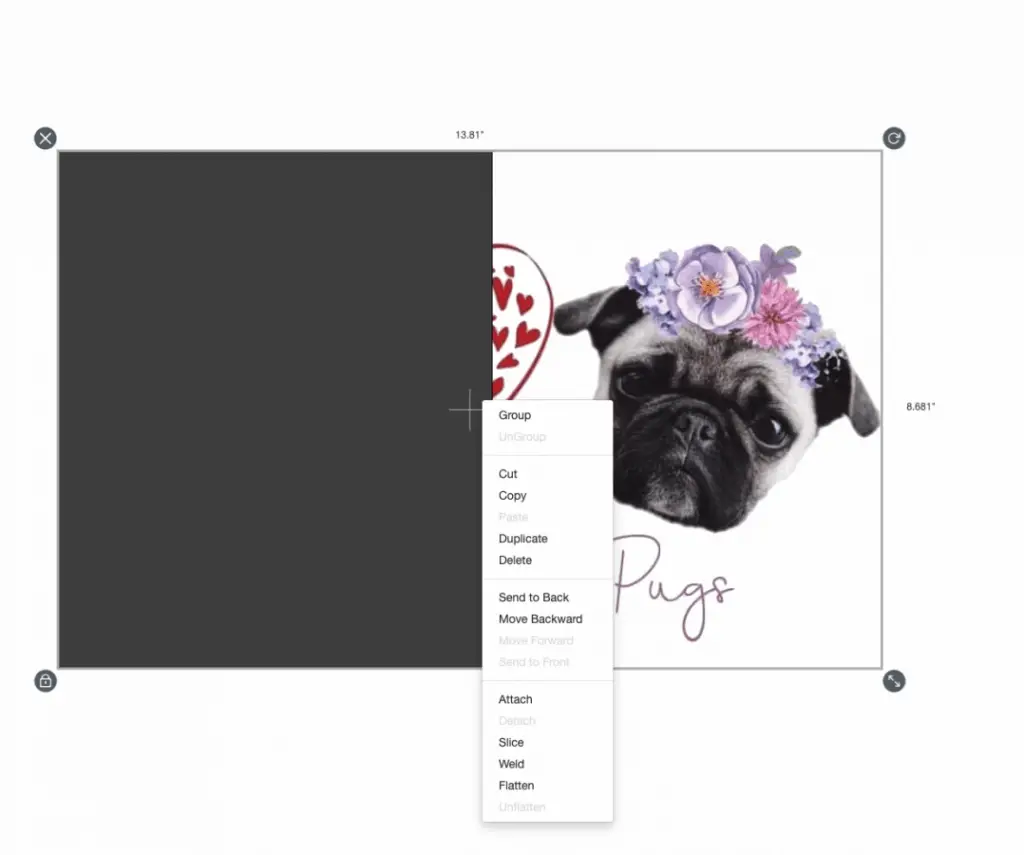
Create a rectangle by following the steps mentioned above. Then duplicate it as many times as needed to fit your image over the bunch. Take your image and align it over all of the rectangles until your image is covered. Make sure you don’t overlap any.
One by one select the area of your image and one rectangle (not exceeding two items) and slice them. If you are unfamiliar with the slicing tool here is a quick tutorial on that.
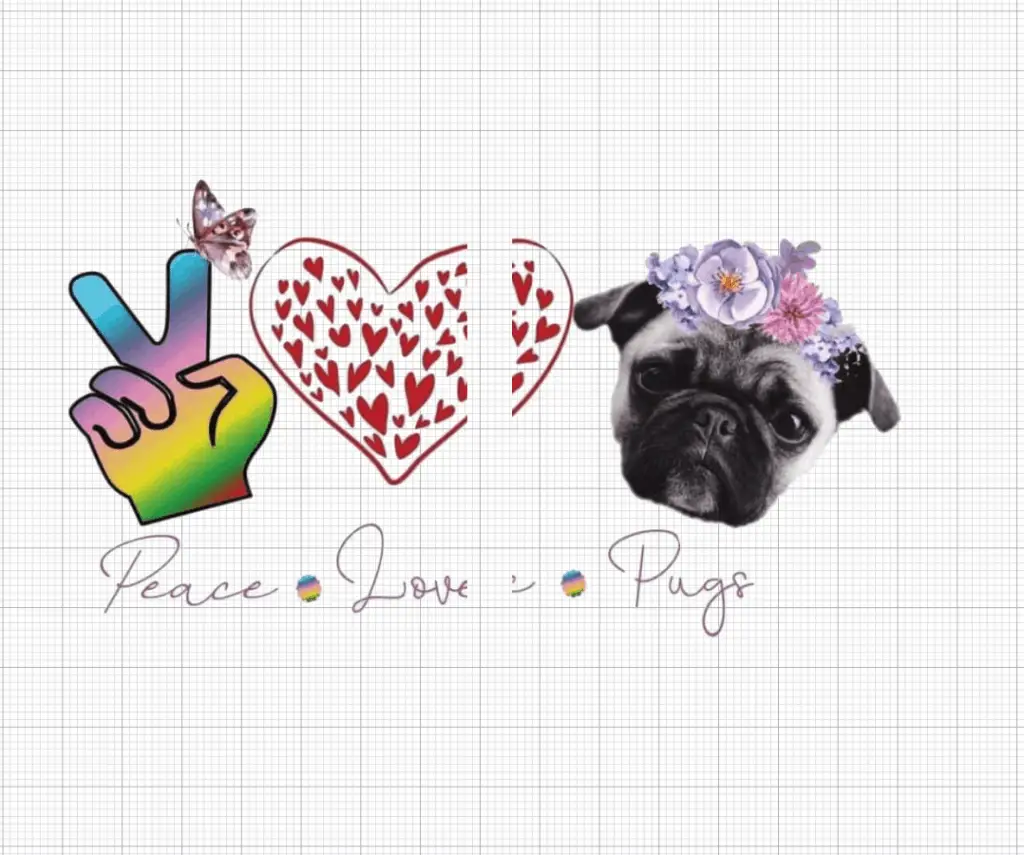
Once you have all of your pieces sliced put them together the way they should be when placed on your substrate, to check for any mistake or cut offs. Sometimes they sneak in and I have learned the hard way what to look out for.
Remember to remove the extra pieces of rectangle before you make it!Select make it and your image will appear on the amount of rectangles you sliced in different mats. You will cut them one by one and then place on your substrate in order and finish your project.
Pretty easy but can be risky if your customer does not want it that way. It is a fantastic work around for everything BUT tshirts!
Want multiple image on one sheet?
There will come a time in your crafting career that you will either want to save some trees (or vinyl) or you will discover sticker making with your Cricut (best EVER) <—-tutorial here! When that time comes you may think you are just going to have to suck it up but you don’t!
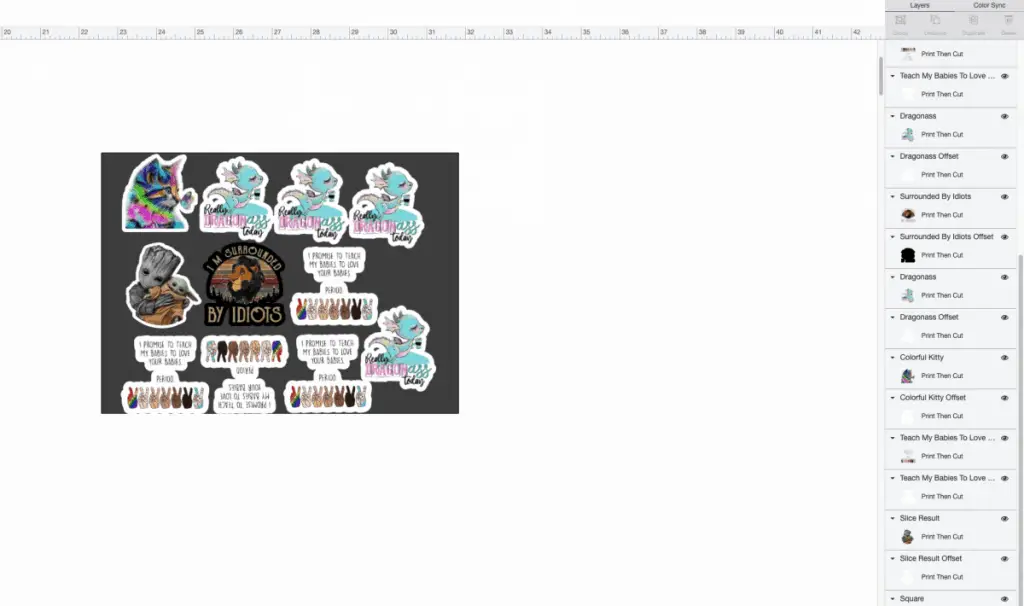
Create the rectangle for sizing, align so that they cover every inch 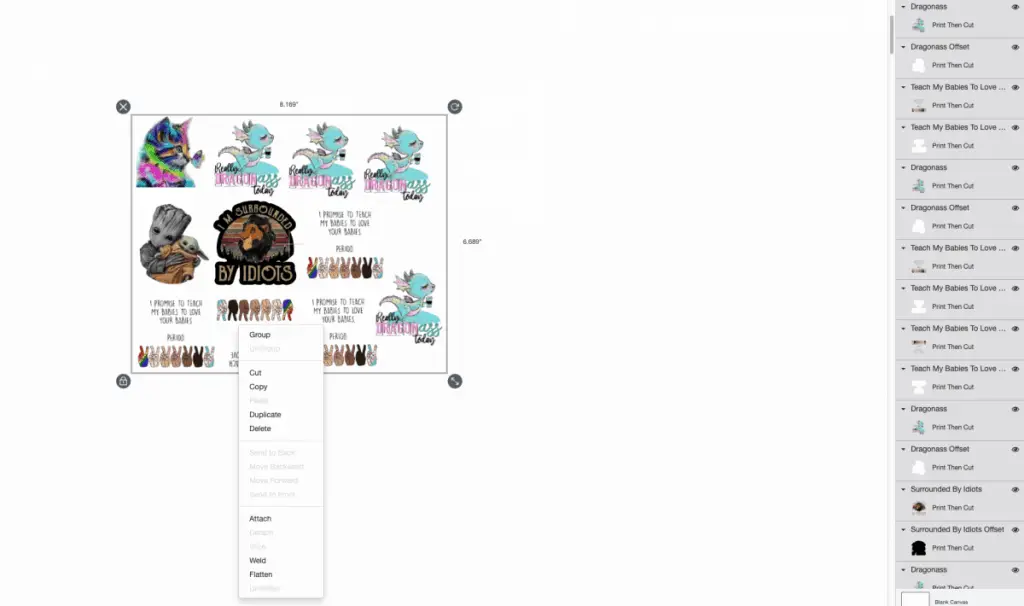
select “flatten” 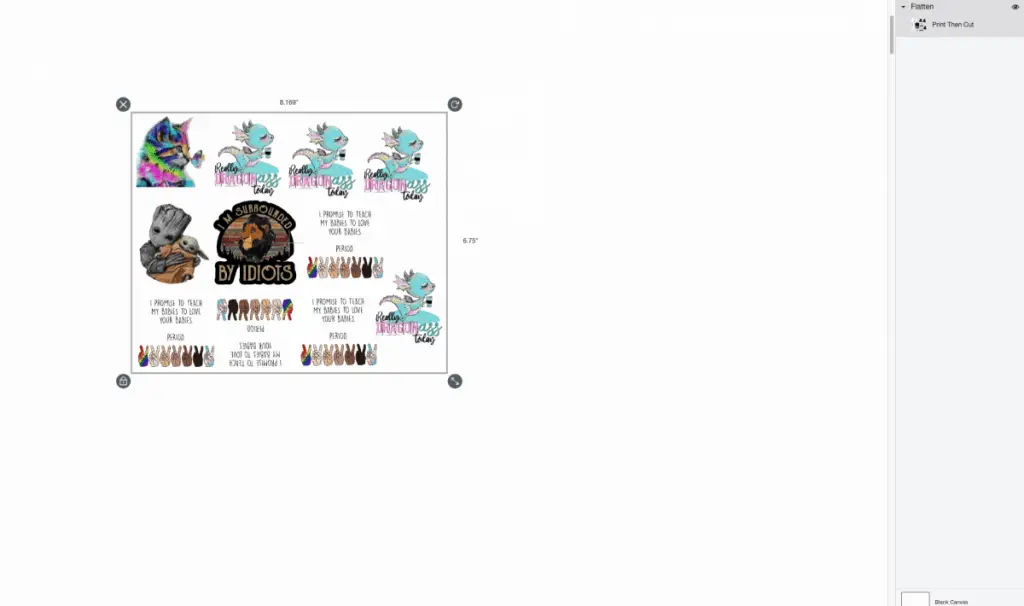
BOOM one sheet!
Take the rectangle trick from above, then line all of your images up on top of the rectangle, getting them as close as possible to the edges without going over at all. I can usually cram 15-20 stickers onto one sheet, more if they are smaller planner type stickers. Then remove your rectangle and select all of your nicely aligned images and click flatten. This will create one sheet of stickers that should take over almost a full sheet of paper/vinyl!
When
The current question of when is tough, as in when will Cricut get rid of the size restrictions for print then cut? I have a good feeling it will be sooner rather than later. They are releasing so much recently and growing their machines and products, so I feel like this feature is at the top of their list. There is probably a few developers or programmers loosing sleep trying to figure it out.
Give up.
Just kidding, I would never ever tell anyone to give up! Crafting is built on three words, create, inspire, teach. You will have times that you want to give up, you will get so frustrated by things like the unsupported or reduce size image that you want to throw in the towel and call Cricut every name in the book. Read through my tutorials, watch mine and my fellow YouTubers videos, ASK QUESTIONS regardless of how much RBF we have we are incredibly psyched to help you in any way that we can.
Be sure to check out some other nifty functional craft ideas through our other posts here on Craft-ILY as well as checking out some videos on DIY and How To’s over on YouTube. Look for “Crafting Unedited” or just click the name in blue to see!

