As a Cricut owner new or veteran, you have probably started to dive into more than what Cricut offers as far as fonts and images. Uploading fonts in Cricut Design Space is pretty easy, it can be done in just a couple of minutes without special software or even being tech-savvy. In this article, you will learn how to upload and install fonts onto a Windows PC or a Mac (Apple) Computer.
You have probably also seen some ads for other sites with “free fonts”. Which means you may be a tad confused on exactly how to get those fonts and images into Cricut Design Space, right?
Getting Started
Before we get to the “how” let’s discuss the “why”, as in why would you need to install new fonts to a software that already has thousands to choose from for free or as part of your Cricut Access subscription?
While Cricut has hundreds of really amazing fonts available, they don’t have them all. For example, Cricut partnered with Disney and other major cooperation’s which means they are allowed to sell their graphics and fonts on their sites and in their software. While they partnered with Disney they don’t have all the Disney fonts from the movies and what not.
For example, I had to search a different site to get a font that resembled the Star Wars font for a gift, in no way could I find how to purchase the actual font through Disney so I wouldn’t get hit with a copyright lawsuit.
If you didn’t know already there are some really amazing sites available to purchase fonts from, many have free fonts as well. You can find a list of my favorite sites here.
Once you find the font you like or need you are ready to start the process of downloading.
Downloading Your Fonts
Before you can download the font to Cricut Design Space you have to download it to your computer, this is super easy. All you need to do is go to the site with your font you want, click on “download” and wait for it to download to your computer. Most of the time it will automatically go to your “downloads” folder. If not I have found that just looking in the “recent” folder is easiest.
The process from here will depend on if you have a Mac or a Windows computer.
Installing Fonts on Windows
The following steps are for downloading fonts using a Windows computer.
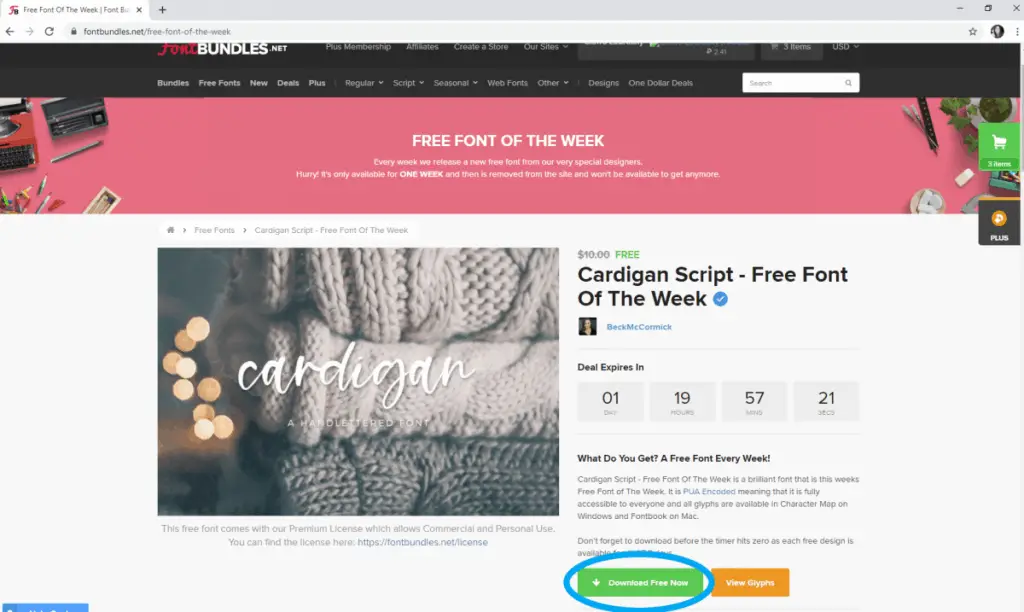
Before you start installing fonts you want to close out of Cricut Design Space completely, if not you will have to do it in the midst of the process and it is just easier to do it from the start. Once you have done that you will go to the site that you found your font on, I went to fontbudles.net for this one.
Once you are on the site and have your selected font open just select “Download free font” or purchase the font if you are buying a license then select the “download font” button. For free fonts it looks like this:
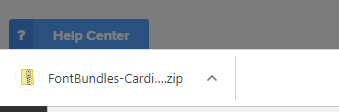
After you have downloaded the font it should go to the bottom of your screen for easy access. Like so:
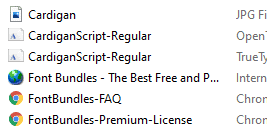
Double click on it to open the zipped file, it will open a window in your documents folder. find the font name and double click again. You will see a bunch of file names that you probably do not understand and that is totally fine, you only need to worry about the TTF.
NOTE – TTf stands for “TrueType font style” file
See below:
Again, double click on the TTF file, this will open a new window that looks like this:
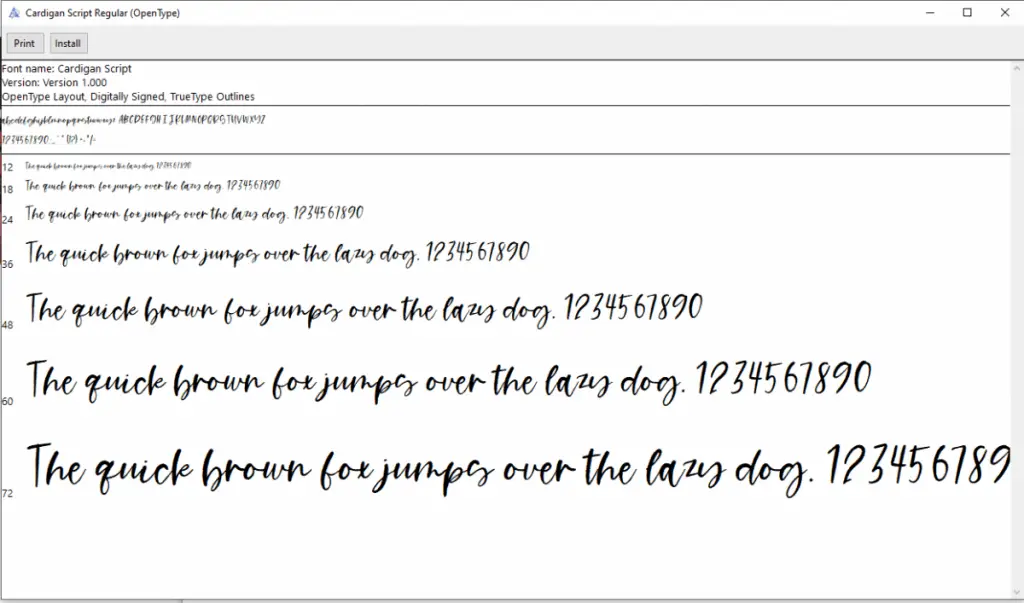
This window serves two purposes, to preview the font in several sizes as well as the number and symbols and for you to print or install the font. Sometimes I will print the page so that I can quickly reference it when I am choosing a font. To install the font you obviously want to click on “install”.
Once you have selected to install the font you will then see a small window appear and disappear, this is just the computer telling you what it is doing.
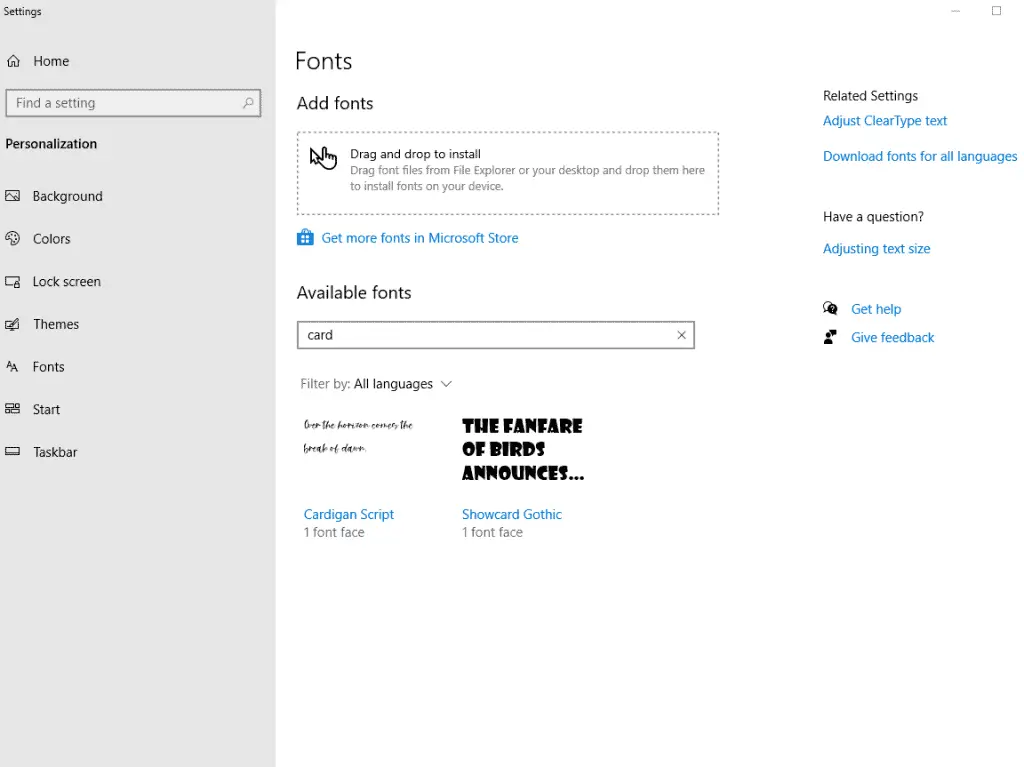
After that you will go down into the windows search bar and type “fonts” then select “font settings”. When you do this you will see that you can also just drag and drop that TTF file into the fonts settings. I prefer the “install fonts'” method, this way I know its fool proof.
Just type in the name of the font you just installed into the search bar and there it is. If your font is not there, this means it did not finish installing. just wait a few moments and it will be there.
Then you just open up Cricut Design Space (remember that we closed it completely before we ventured in installing the fonts right), go ahead and try to add text to your canvas, select the font window and type in the name of what you downloaded into the font search bar and it should be there!
NOTE – make sure you have “all” selected in the font options, sometimes Design Space automatically just searches Cricut fonts.
Installing Fonts on a Mac (Apple) Computer
The following steps are for downloading fonts using a Mac (Apple) computer.
Most of the process for installing the fonts on a Mac are very similar to installing them on a Windows PC, just a couple of differences.
Before you get started on your installing font endeavors remember to close out of Cricut Design Space first.
First you will go to the site of your choosing, once again I chose fontbundles.net and am using a free font. After selecting the font you will select “download free font”.
From there it will go into your “downloads” file unless you have it routed somewhere else automatically then it will go to that destination. For ease of finding I leave it in downloads.
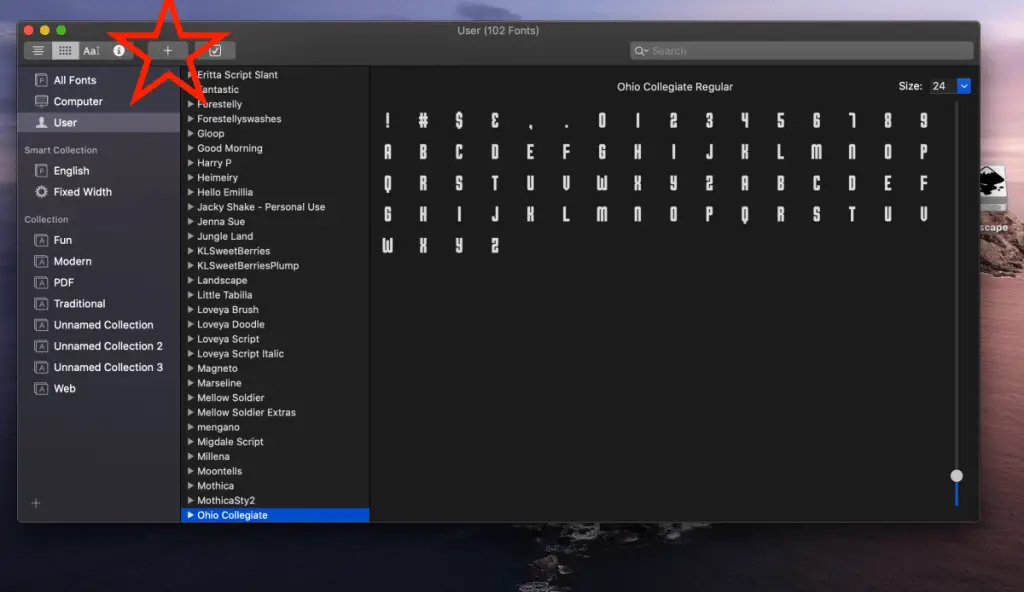
Go to the file that was saved and double click on it, this will open a window and unzip the file. Then you will go over to your “launchpad” tab on the desktop and find your “fontbook” which is where all of the fonts are stored on your Mac.
Up in the top left corner (kind of middle left) you will see the button that is a + symbol (see below) go ahead and click that. From here you will simply search for your new font or fonts if you found multiples and select them and hit “open”. Once you have done that your fonts are now added to your Mac as well as any apps that are installed.
Now, just go to your Cricut Design Space app and open it up, create a new canvas, select text, type some words, then go to the font selection and search for your new font by the name, select it and bam, you have added a new font!
NOTE – make sure you have “all” selected in the font options, sometimes Design Space automatically just searches Cricut fonts.
All Other Devices
As far as adding new fonts to Design Space on an iPad, tablet or other devices it varies. I am an avid Apple user so I know all about Apple, for iPhones and iPads once you install the font to your Mac it automatically (if you have them all connected) installs on the other devices as long as you close Cricut Design Space and reopen it.
Andriod users, I am in the dark here on this one so if you are reading this and have some insight as to what that process is, then fill me in! As always if you aren’t successful in the method I have taught above, reach out and I will be happy to guide you through it.
Be sure to check out some other nifty functional craft ideas through our other posts here on Craft-ILY as well as checking out some videos on DIY and How To’s over on YouTube. Look for “Crafting Unedited” or just click the name in blue to see!