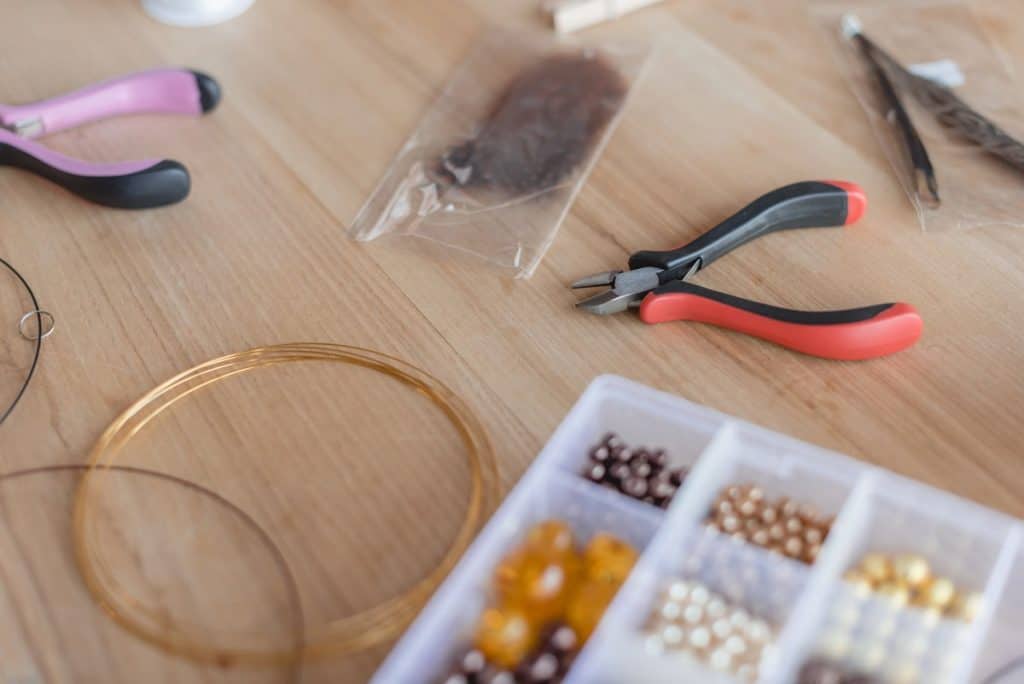
So you have decided to take the leap and start making your own jewelry, how amazing and fun! Soon you will learn that jewelry making is not for the faint of heart, it takes a lot of patience, focus a good grip and some very good eyesight. Most importantly you will need a handful of essential tools and a vivid imagination to get you started in your new found passion.
Some of the most basic tools you need include the following:
- Pliers (nylon wrapped, flat nose and round nose)
- Tweezers
- Crimping tool
- Ruler
- Wire cutters
- Wire (in all gauges)
- Wire bender
- Filing tool
- Beading needle
- Practice material
- Trays for keeping your materials tidy
- Assorted findings (don’t worry I will cover what these are)
Of course you will need more in the long run but these are just what you need to get started. You will also learn that you will acquire more and more as time passes, especially if you realize you have a major passion for this stuff. Hobbies are expensive and unless you start selling your makings you will need a good budget to keep up with this one (taking from personal experience).
I started making jewelry as a hobby, quickly I realized that it was a great deal of expensive but I also came to realize that there is a very high demand for handmade custom jewelry! I would make something and post the finished product or give it to a friend as a gift and within a day have at least one person make a comment about how they just had to have it or asking how much it would cost.
As I built my now customer base I started getting requests for more types of jewelry, it was no longer just your basic earrings, necklaces and bracelets. Soon they wanted rings and leather type jewelry or more higher end stuff like sterling silver and semi precious stones and such. Now we are not going to cover the tools needed for this type of making just yet, being more complex to make we will cover those in an entire post on their own.
I vividly remember at one point being very overwhelmed with all the different requests and terrified I wouldn’t be able to make what they wanted and lose them as a customer. So in order to not overwhelm you and keep you focused on just the essentials that is what we will cover, the basic tools needed for basic jewelry making.
So I did what every human does these days, I googled it. I dug to find how to videos (real ones, not edited or fancied up), tutorials and guides. The more I dug the more frustrated I became, I was finding the info but I either had to read through a bunch of junk before getting to what I needed or watching a video that had been so fluffed up I forgot why I was watching it.
Moral of the story folks, that is not what I am here to do, I am here to help you and give you the exact tools you need, what they are used for and how to use them. No BS no fluffing, there will be some editing because ya know, writing.
Basics
Let’s just review the basic tools you need to get started. In each portion you will find details about every tool you will need to start you jewelry making fun!
Pliers (nylon wrapped, flat nose and round nose)

There are two types of pliers you’ll need and a third type that plus the role of the other two as one.
The first is a pair of flat nose pliers, these are used for many things but mostly for gripping and twisting metal. With flat nose pliers you do not need to be over picky on finding the best out there, just a good solid pair will get you a long way.
The second pair of pliers you’ll want is the round nose pliers. Round nose pliers shape your jump rings and headpins (more on these later). They are also used to bend metal but are not great for gripping to twist it as the tip is round and does not grasp hold of much unless the material is wrapped around the tip of the pliers.
Last and quite possibly the holy grail of pliers you should definitely have in your arsenal of pliers are the nylon coated pliers. These bad boys take the place of both the round and flat nose pliers. With the nylon coated tips you can easily grasp your material, bend, shift and twist away without worrying about losing your grip.
Tweezers

Tweezers should be a given for jewelry making but most people won’t add them to the list because they assume you have some laying around already so why mention it? Well they should mention that you need some GOOD tweezers with good grip and more than a tiny tip.
Why, you ask? You will use these tweezers for nothing but your new found hobby/business and they will be used for picking up tiny beads, gripping perfectly round stones and beads when you can’t get a grip on them and for feeding thread through a beading needle or tiny hole in a bead (more on that later too).
Ruler
Rulers are a “common sense” tool you need, but I highly encourage you to purchase two types a sewing tape (or measuring tape) and a wooden school ruler (don’t quote me on what they are called, that’s just what I refer to them as), you know, the kind with the little divot in the center. I prefer this ruler over most because I use it to measure out and contain my bead mess. The center divot is the perfect little spot for the beads.
Crimping Tool
A crimping tool is needed for closing the findings you will read about here shortly. You can use pliers for this but I assure you crimping tools making it super quick and seamless. You can even find some really good pliers that have a crimping tool included (and some like mine that include a wire cutter!)
The crimping tool typically has coated handles for gripping and two circular openings for different sizes of findings. You will find that you do not need more than the two, they are pretty universal.

Wire cutters
Wire cutters are a necessity even if you don’t plan on working with wire. Strange right? Nope, I say this because anytime you purchase beads chances are they are attached to the place holder with a thick cord, plastic string or you guessed it wiring. It is a good idea to have these instead of using your scissors, if you use your scissors to cut thicker materials you take the risk of damaging them. Scissors just won’t cut it sometimes..all puns intended!

Wire (in all gauges)
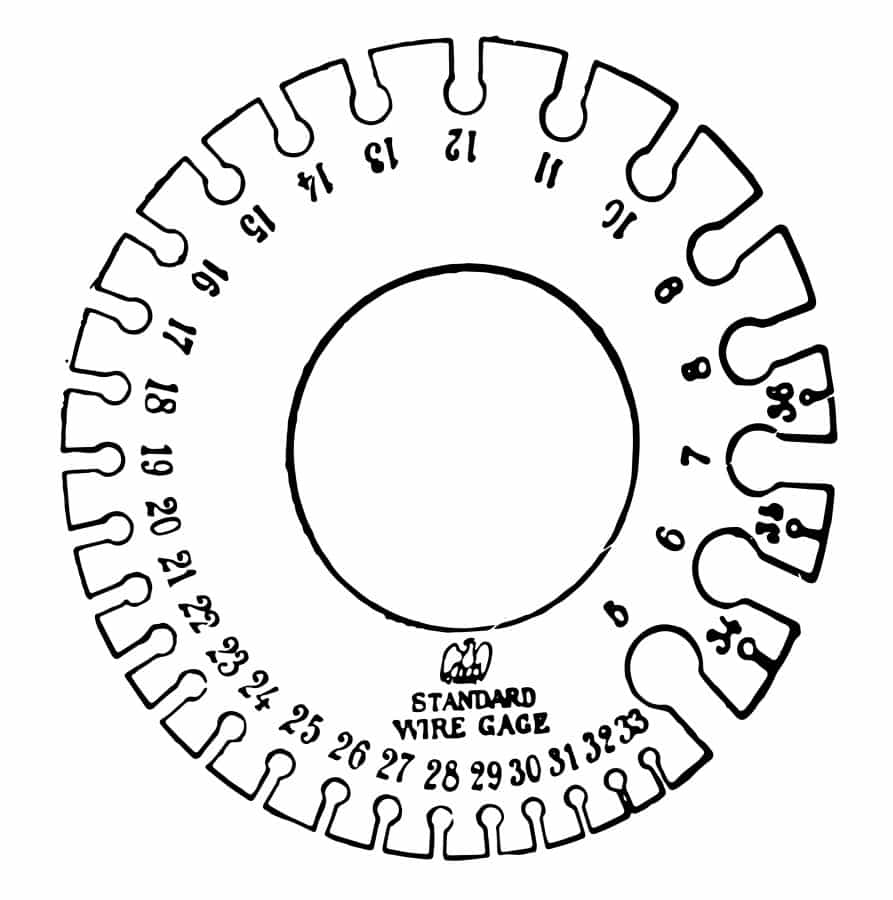
Wires for jewelry making are measured by what is called a gauge. The “gauge ” is determined by the thickness or hardness of the wire. The thicker and harder the wire the smaller the gauge. Yes it is backwards but that is how it works. The reason is that as the wire becomes harder there is less gap in the metal. So when you think about it the gauge is measured by the lack of air in the wire making it more durable.
There are several sizes of wire out there and those sizes are referred to as “gauges” I have created a chart for this to help you understand it a little better, see below.
| Wire Gauge | Inches |
| 10 | 0.102 |
| 12 | 0.08 |
| 14 | 0.064 |
| 15 | 0.057 |
| 16 | 0.051 |
| 17 | 0.045 |
| 18 | 0.04 |
| 19 | 0.036 |
| 20 | 0.032 |
| 21 | 0.029 |
| 22 | 0.025 |
| 24 | 0.02 |
| 25 | 0.018 |
| 26 | 0.016 |
| 28 | 0.013 |
| 30 | 0.01 |
| 32 | 0.008 |
Different gauges are used for different styles of jewelry making. You will learn what is better to use for each different piece as you go. To me it’s more of a personal preference, when I looked up what gauge to use to make a ring I found that I liked working with the thicker wiring.
Some might prefer a more vivid image for a guide so I added one for you. Now keep in mind this image does not include all gauges and the chart does not either. The ones listed are the most commonly used gauges for wire working.
Wire bender

Wire benders are a life save and a must have when it comes to making jewelry. You would think this specific tool would be common sense but I honestly did not even think about it until my fingers and wrists were sore from bending and twisting wires.
Trust me when I say you need a quality set of wire benders, they don’t cost and arm and leg but finding the right pair can be sort of tricky since there are many types. It really depends on what you are trying to accomplish.
First we have the Wire Bending Jig, these are the most durable and dependable tools for bending thicker gauged wire. The Wire Jig is really the only tool you will need IF you have the work space to account for it as it does attach to your workstation with two screws. This creates a secure hold for your wire bending work.
Next we have the wire bending pliers, these work really well for all types of wire, even the thick stuff. If you do not have the space on your work station to attach a jig these are the next best thing. Oddly enough though, they do cost about double the cost of a jig, due to their portability (I think, I honestly could not tell you why they are more expensive).
Practice material
Ah, practice material. Practice makes perfect right? Absolutely! The more materials you have to play with the better you will get and be able to learn more as you go instead of trying to learn then realizing you have to go out and get more and end up having to learn all over again. If you are a visual learner like me you most definitely need a lot of practice material!
Some practice materials you can grab are:
- Beads
- Stones
- Thread
- Cording (leather, stretch and thread are all great choices, a variety is a must!)
- Wire (already mentioned)
- Charms
- Findings (keep reading to see what these are)
- Anything else that is pretty and catches your eye
Filing tool
A filing tool is not a nail file, though a nail file will work if you’re in a pinch! There are actually many types of files used for jewelry making, however we won’t go into detail about all of them only the basics needed to get you started.
The most utilized filing tool is a scraper tool, these are used for cleaning, smoothing and de-burring metals and plastics. If you are working with wire and the end piece is catching or feels rough, the scraper filing tool will smooth it out.
Needle file, the needle file is used for those tiny and hard to reach places, like small spaces between layers of metal, or where you wrap wire while making a ring and such.

Beading needle
The last tool you will need in your essentials is a beading needle. Beading needles are the most unpraised tool when it comes to jewelry making. I mean, we could just thread the bead on our own making life more complicated than it needs to be, right?
WRONG! I was so wrong, I did not even think there was such a thing as a beading needle, I thought it was just another needle. Reality is that beading needles make life as a newbie jeweler so much easier. Once you get your hands on one of these you will feel like a beading queen!

These look like a basic needle until you pull them out of the package, then you notice the differences, which are that the beading needle is bendy, flexible and separates down the middle so that you can thread your cording or thread through. Once you have threaded your needle you are ready to start adding your beads in.
Trays for keeping your materials tidy
These are a must! Your workstation is bound to get chaotic and messy, so you will want space for all of your materials to live. I highly recommend a few products for this subject. you can easily select the item to view details on my favorites.
- Storage cart
- Bead storage (little clear containers or compartmentalized drawers)
- Tool case (for the most used tools)
- Bead trays

Findings
What in the world are findings and why do you need an assortment of them? Findings are the various types of clasps, closures, rings and end pieces to finish off or to fill in gaps in your products. You can see here they are fairly inexpensive and add so much value!

Note – Be sure to only purchase quality findings, just because they come with a kit or have a good price does not mean they are worth using. Stray away from anything that has nickel in it or that is not sterling silver, many people have allergies to that stuff and will breakout (me included). If your plan is to sell your items only go for the good stuff.
Good rule of thumb, if you wouldn’t wear it chances are no one will.
Time to Shop!
Now that you know what tools you need it is time to go shopping. I recommend searching Amazon first. However, I always recommend you shop around some before jumping on the “add to cart” or “one click shopping” train. Sometimes the coupons and sales at local craft stores outweigh the convenience of online stores.
If you do it right and stack your coupons with sales and rewards you can get quality tools for minimal cost.
Be sure to check out some other nifty functional craft ideas through our other posts here on Craft-ILY as well as checking out some videos on DIY and How To’s over on YouTube. Look for “Crafting Unedited” to see!