Sublimation has been in the crafting world for quite a while; however, it only recently started gaining popularity. On the other hand, Cricut Design Space is one of the most commonly used software in the crafting industry. So, can you use the Cricut Design Space for sublimation?
You can use Cricut Design Space to create sublimation designs, print them using your printer, and transfer the images onto your fabric using a sublimation printer. In addition, the software offers lots of unique images you can use to come up with excellent sublimation designs.
In the rest of this article, I’ll address more issues associated with using Cricut Design Space for sublimation, including what you need to begin, setting up your sublimation designs in the software, and how you can use it for wide-format sublimation designs.
What You Need To Start Using Cricut Design Space
To start using Cricut Design Space, you’ll need to download and install the software, register for a Cricut Id (or get a paid Design Access account), and set up your printing machine. Once you go through these essential steps, you’re ready to begin creating projects with your Cricut Design Space!
- Download and install the Cricut Design Space app. Make sure you download and install the Cricut Design Space app compatible with your device. Cricut Design Space is available for Android, iOS, Mac, and Windows. You can either install the free version of the Cricut Design Space app or upgrade to a premium one.
- Register with a Cricut Id. Open the app on your device and select “setup product.” Next, fill out the form to register a Cricut Id. The app will then start to guide you through setting up your machine. If you don’t have a machine yet, you can still register an account and begin designing projects.
- Create your designs. After installation, the software will now allow you to create sublimation designs on or offline. You can choose fonts and art to produce designs or select pre-designed projects.
How To Use Cricut Design Space for Sublimation
Now that you’re done with the basics, here’s how you can use Cricut Design Space for sublimation.
1. Open and Set Up Cricut Design Space
After following the above steps to download and install Cricut Design Space, the next step is opening the software and setting up the grid space. Having a clean white background makes the designing process more straightforward, though you can also use the grids.
2. Import Your Images
Go to ‘Upload’ to import the images you’d like to use. Choose ‘Complex’ in the ‘Select image type’ screen, then click continue.
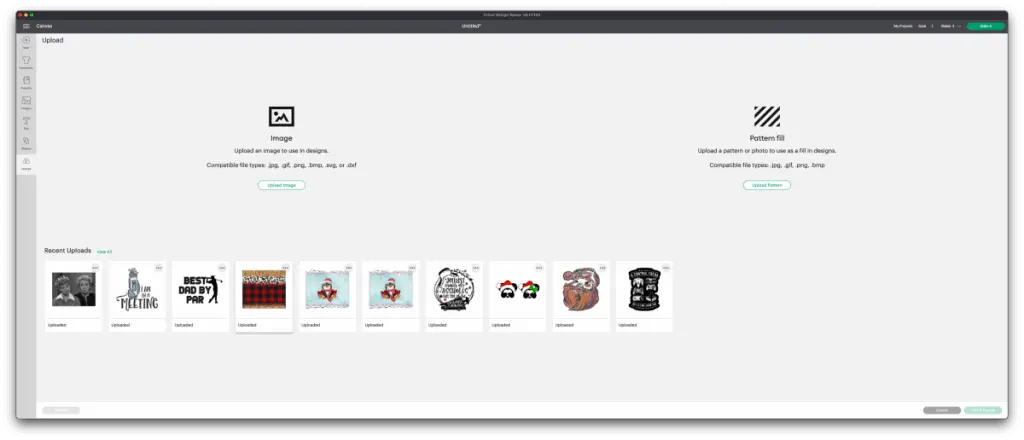
You can upload one or more images depending on the type of sublimation design you’d like to have.
It’s easier to work with images in PNG format than other formats since they come with a transparent background that doesn’t need editing.
If your image has a transparent background, you’ll see checkered squares in the background in the Background Remover screen. If it doesn’t, you can click to get rid of the background, then click Apply and Continue.
3. Save the Uploaded Image and Adjust their Size and Order
In the ‘Select Upload Type’ screen, select ‘Print then cut’ then click ‘Upload.’ If you save the image as a ‘cut image,’ it may end up coming out as a shape.
If you want to use multiple images in your design, follow the same procedure to upload them.
After uploading the image, Cricut Design Space may take a minute or two to process the images.
Once you’ve successfully uploaded your images, select one and transfer it to your canvas. Adjust its size to fit your ornament. You can also order your images if you use more than one in your sublimation design.
4. Add Text to Your Design
You can add a text using the Text tool. Using this tool, you can select your font, resize the text, change the color, and position it on your image.
Cricut Design Space comes with several fonts you can choose from when adding text to your sublimation design.
5. Get a Finished Image
To get a finished image, follow these steps after adding text to your design:
- Go to the ‘fill type’ and change it to ‘print.’
- Highlight both the image and the name.
- Click ‘flatten’ to convert it into a single Print.
- Cut the image.
Now go ahead and click ‘Make It’ on the upper right.
6. Mirror Your Image
After clicking ‘Make It’ in the previous step, your image will show up on a piece of white paper on a mat enclosed by a black box. This is because the Cricut sensors use black registration marks to determine where to cut your image.
Now click ‘Mirror’ to reverse your image. If you fail to mirror your image, you may end up with an image that faces backward when printed on your ornament. Click ‘Continue’ to proceed to the ‘Make Screen.’
7. Print Your Design on Sublimation Paper
Once in the ‘Make Screen,’ Design Space will prompt you to print your image. NOTE – You will need a sublimation printer for this or at least a converted on.
To finally print your design on sublimation paper, follow these steps:
- Select ‘Send to Printer,’ and a ‘Print setup’ screen will appear.
- Keep ‘Use System Dialog’ and ‘Add Bleed’ selected, then click ‘Print.’
- From the System Dialog box, choose your printer.
- Click ‘Preferences’ at the right of the dialogue box.
- Select ‘More Options.’
- Under color correlations, you can either select ‘automatic’ or ‘custom’ depending on your preference.
- Before printing, click ‘Print Preferences’ from the same ‘System Dialog’ box, and choose your print quality.
- Make sure your printer has sublimation paper, then click ‘Print’!
8. Transfer the Image to the Object
At this point, you’re ready for sublimation. Take the printed sublimation paper with your image and proceed to print the design onto your object of choice using your sublimation printer. You’ll also need a heat press for this process.
Here’s a great video tutorial on how to go about this:
How To Use Cricut Design Space for Wide-Format Sublimation Designs
The challenge with Cricut Design Space is that it doesn’t accommodate wide-format sublimation designs. However, you can bypass this limitation using a virtual printer, e.g. Bullzip PDF printer.
Bullzip PDF printer is a virtual printer, implying that it prints to a print driver but saves it as a file. Here’s how you can use it to print wide-format designs:
- Instead of selecting your usual printer to print the image onto a sublimation paper (refer to step 7), select Bullzip PDF printer. From the drop-down menu that’ll show up, name your file, change the format from PDF to PNG, and click ‘Save.’
- Crop your design to eliminate the visible solid margin using your standard PC photo editor. Then save a copy of the cropped image.
- Import the image to software that can allow you to print wide-format designs. If you don’t have one, you can use Microsoft Word.
- Open Microsoft Word and size up the paper to any dimensions you’d like to have, depending on the type of your printer. For example, if you’re using an Epson000825 printer, the maximum size of the design you can print is 13 inches by 19 inches (33.02 cm by 48.26 cm).
- Insert your image into Microsoft Word. Re-adjust its size before printing it onto your sublimation paper.
Now you can proceed to transfer your design through sublimation.
Check out this video for a visual description of this process:
Final Thoughts
While you make be thinking that this is a lot of steps to get to your sublimation prints, I can assure you that this is a sure fire way to use Cricut Design Space to achieve high quality and vibrant images for sublimation. Sublimation is such a fun way to create unique items. Here are a few places you can also get high quality designs and images for sublimation and more!
Here are some super useful sites and tools for getting your images free of copyright issues:
Design Bundles – designbundles.net offers thousands of SVG’s sublimation images, brushes and fonts for ProCreate and so much more. The inexpensive monthly plus plan is the best way to go, you get tons of free credits to purchase their “plus”products that come with the commercial use license.
Design Space/Cricut Access – If you use Cricut you have access for $11/month to thousands of fonts and images as well. I always search Design Space for what I am looking for first, this way I don’t have to go through all the steps of uploading and what not.
I also use JPIBlanks.com for images often as well. They design the images/files themselves so the copyright is released when you purchase the image/file from them. Sometimes they will even do a coupon code for free images!
Be sure to check out some other nifty functional craft ideas through our other posts here on Craft-ILY as well as checking out some videos on DIY and How To’s over on YouTube. Look for “Crafting Unedited” or just click the name in blue to see!